Welcome to my crazy world of real food cooking ...

Eat Food. Not too much. Mostly Plants. -- Michael Pollan

I wish I could take credit for that because I think it sums up how we should eat. Simply -- eat stuff that really is food, instead of stuff that is food like substance. The supermarket is almost entirely food-like-substances, and, my friends, you should probably never ever eat them.

Fortunately, there is a world of deliciousness out there, and it can all be had in a way that not only doesn't harm your health, but in a way that benefits you hugely.

I think it's important to eat stuff that satisfies you, that keeps your blood sugar stable, and that gives you stuff your body really needs to run optimally.

But baby, it's gotta taste good.

I really like getting experimental in the kitchen. I love cooking, I love layering flavours, and I love coming up with really super yummy food. I have very strong opinions about what constitutes food, and there are a lot of things I won't touch in the kitchen. Bottom line? Pretty much everything I make is ridiculously good for you even if it tastes decadent. Although there are occasional big fat cheats ... but even those stick to real food, my friends.

For food that is usual gluten free, usually free of cane sugar, usually super low on the glycemic index, full of protein, fiber, flavour, and excellent energy, join me and Alice down the rabbit hole.

Every recipe on this blog is my own original effort and idea, so please pass 'em on, giving credit where credit is due.

Many thanks, and come back often. I'm really glad you are here!

:)

Tuesday, 19 October 2010

Sweeeeeeet Potato Frites


We're big fans of the man we call The Sweet Potato Man at East York Civic Center Farmer's Market. (http://ontariosweetpotato.com) His tasty goods are chemical free, as well. My son likes to sample their raw sweet potato 'fries', which you can buy by the bagful. I just by the sweet potatoes by the basket, whole.

We decided to cut 'em up and oven bake them for a frites-like result. Because of the high moisture content, they are not terribly crispy. They are, however, tasty, easy to eat with your fingers, and quite nutritious.

ingredients:

 4 medium sweet potatoes
2 tbsp extra virgin coconut oil
sea salt and pepper

directions:

1. cut the sweet potatoes into 'frites'
2. toss them in a bowl with the oil and seasonings (I bet a little chili powder would be nice ...)
3. bake them in a single layer on a lined baking sheet at 345 for 1 hour or until they achieve a texture that pleases you

The Perfect Rolled Cookie -- Not.

Rolled Cookies v 6.0


fresh out of the oven

I have not yet perfected my rolled cookie dough. We've gone through many tasty incarnations and versions, all of which have something to recommend them, but the pursuit of the ideal shall continue. Fortunately, the less than perfect results still seem to please the palate of my 2 1/2 year old, as well as all the 2 1/2 year olds around who think I am just someone who always has cookies.

I am quite keen on both v 5.0 and v 6.0 of my rolled cookie efforts. They differ quite a bit. V 5.0 employs some coconut flour, which gives the dough a good body and texture, and makes it more rolling friendly. V 6.0 uses some carob powder and maca powder, which give the cookies an additional sweetness that the earlier version doesn't have, but is harder to work, even when thoroughly chilled, because the dough never achieves that stiffness and firmness that refrigerated dough needs to achieve. I think a version that includes some coconut flour as well as some carob and maca might be in my future, but right now I am out of coconut flour. Here are the recipes, regardless.

version 5.0

ingredients:

1/4 cup + 2 tbsp water (warm)
1 tsp egg replacer + 2 tbsp water (or 1 large eggs)
1/4 cup extra virgin coconut oil
1/4 cup coconut palm nectar
1/2 tbsp vanilla
1/2 tbsp apple cider vinegar

1/2 tsp sea salt
1/2 cup flax meal
1/2 cup pecan meal
1/4 tsp baking soda
1 1/2 cup finely ground almond flour
3/8 cup coconut flour ( 1/4 cup + 2 tbsp)

directions:

1. combine wet ingredients
2. add dry ingredients and mix thoroughly
3. chill for a few hours or over night
4. roll out dough between 2 pieces of baking parchment 
5. cut into desired shapes
6. place on lined baking sheet and bake at 345 for 14 minutes


version 6.0

ingredients:

1/4 cup + 2 tbsp water (warm)
1 tsp egg replacer + 2 tbsp water
1/4 cup extra virgin coconut oil
1/4 cup coconut palm nectar
1/2 tbsp vanilla
1/2 tbsp apple cider vinegar

1/2 tsp sea salt
1/2 cup flax meal
1/2 cup pecan meal
1/4 tsp baking soda
1 1/2 cup finely ground almond flour (such as JK Gourmet)
1/2 tbsp cinnamon
1 tbsp maca
1/4 cup carob powder

directions:
1. combine wet ingredients
2. add dry ingredients in order listed
3. mix thoroughly
4. chill thoroughly
5. roll between 2 pieces of baking parchment, and cut into desired shapes
6. bake on a lined baking sheet at 345 for 14 minutes.

Both versions of these cookies keep very well in an airtight container in the fridge, and still taste great over a week later.

Squash and Pecan Patties -- Yes, More Squash


YET ANOTHER SQUASH RECIPE

With a toddler in the house, I'm keen on things that can be picked up and easily eaten. Although I see the importance of practicing with utensils, sometimes his patience is less than his tummy capacity. Call me crazy, but I hate seeing my son go to bed hungry. For this reason we make pancakes a lot -- out of spinach, out of chickpea flour, out of eggs and broccoli, or out of more traditional pancake ingredients. If he can pick it up and eat it sans frustration at the end of a tiring day, there will likely be a happy ending to dinner.

With so much squash rambling around in our house, I thought it would be fun to make squash patties.

ingredients:

1 cup cooked (red hubbard) squash (but you can use whatever you like. Maybe not spaghetti squash)
1/2 cup pecan meal
3/4 tsp sea salt
1 tsp apple cider vinegar
1 tbsp coconut oil
black pepper

directions:

1. finely chop the cooked squash
2. mix in the pecan meal
3. add the remaining ingredients and season (I think next time I would add some chili powder) to your taste
4. scoop the 'batter' onto a baking sheet and flatten a little into rounds
5. bake at 345 for 30 minutes

Make Your Brussels Sprouts Stand Up and Sing


BRUSSELS SPROUTS THE WAY THEY WERE MEANT TO BE

Tuesday morning is the fabulous Farmer's Market at East York Civic Center. My favourite chemical-free vegetable vendor there sells the most adorable little brussels sprouts. Unlike the golf ball or egg sized brussels I usually see, these are diminutive. They are marble sized -- some like the little wee marbles, some like the bigger marbles, but all well under 1 inch in diameter and height. I'm not the biggest fan of the brussels sprout, but when they are cooked in such a way that they absorb some flavours and become tender, I think they are a groovy little vegetable. This recipe will work regardless of the size of your brussels, and you can adapt the ratio of tomato-to-brussels to suit your palate. I think I used a ratio of 1:2 (as in 2 cups chopped tomatoes to 4 cups of brussels sprouts).


ingredients:


extra virgin coconut oil


1 cooking onion
1 clove of garlic

sea salt
pepper

fresh tomatoes


brussels sprouts


ground cumin
marjoram
mesquite powder
chili powder


directions:


1. finely mince the garlic and onion, and cook in coconut oil in a large saute pan on low heat. This is a good time to add cumin
2. finely chop the tomato, and add it to the well cooked garlic and onion
3. season with salt, pepper, and marjoram
4. chop the brussels sprouts. If they are small, quarter them. If they are the larger variety, you might choose to cut them smaller, but that's up to you.
5. add the brussels sprouts to the pan, and season with chili powder and mesquite. I used a lot of mesquite and a little chili powder. I think I also added more salt and pepper, and a touch more cumin at this point. If you like this without spices, you can stick to salt and pepper, and maybe a little marjoram. Seasoning is very subjective. But I will say with conviction that cumin and brussels sprouts are definitely good friends.
6. simmer until your brussels sprouts have achieved a texture and flavour that pleases you.
7. serve as a side, or in a bowl with a piece of fresh bread beside.


Monday, 18 October 2010

Miso Super Soup


YUMMY MISO SOUP WITH EVERYTHING :)

Lucius: Honey? 
Honey: What? 
Lucius: Where's my super soup? 
Honey: What? 
Lucius: Where - is - my - super - soup? 
Honey: I, uh, put it away. 
Lucius: Where? 
Honey: Why do you need to know? 

I've been in the mood for the simple goodness of miso soup these past days. Dinner tonight was miso everything soup. It was super.

ingredients:

4 cups filtered water
2 - 4 tsp vegetable bouillion (sans msg please)
2 cups gluten, cut into small, bite-sized cubes
2 cups cooked noodles (I used konnyaku noodles which technically don't need cooking -- I think they are also called yam noodled? Soba would also work well. You could try whole grain spaghettini,  methinks.
3 heaping cups broccoli, dismembered into bite-sized pieces
2 - 4 tbsp organic miso (I used white miso)

optional garnishes:
chopped green onion
sesame seeds
freshly grated ginger root
wasabi

directions:

1. using a medium sized pot, heat water with bouillion seasoning
2. add gluten, and bring to a simmer
3. add broccoli and cook for a minute (you can also add the noodles here if using the konnyaku noodles)
4. turn heat down to low, and add miso (by dissolving in some of the broth in a separate bowl or cup then adding to pot) and any non-konnyaku noodles. Allow to come back up to heat, and the turn off and cover for 10 minutes. This last will permit the miso flavour to permeate the ingredients without denaturing the beneficial enzymes in the miso.
5. scoop into bowls, and garnish at will
6. you can also add a small scoop of cooked rice to the individual bowls for a heartier soup

enjoy with loved ones on an autumn evening

serves 4 generously


Sunday, 17 October 2010

Vegetarian 'Meat'


Toula: Actually, um Ian’s a vegetarian. Uh, he doesn’t eat meat.
Aunt Voula: He don’t eat no meat? HE DON’T EAT NO MEAT?! *Long silence* Oh that's ok, I make lamb.


I love that exchange from My Big Fat Greek Wedding. It kind of reminds me of the exchanges I've had with my own relatives (or in-laws).


It is possible to make an interesting vegetarian protein that involves the protein found in wheat, called gluten. Some people do not tolerate gluten well, and can't digest it. However, for those among us who are not troubled by it, it makes a fun alternative to the adorable chickpea. I find it easiest to start with gluten flour, although some people like to start with wheat flour and wash it until only the gluten is left. As someone who is generally looking for shortcuts and time/labour saving options, I have only used already extracted gluten in the form of gluten flour.


There are many methods and recipes, and regardless of which you choose, I can't stress enough the importance of cooking the gluten for long enough, preferably at a very gentle simmer.


equipment needed:


food processor
medium sized pot with lid


Part one)
ingredients:


1 1/2 cups gluten flour
1 tbsp coconut oil
1 1/2 tsp sea salt
dash of soy sauce
a few drops of sesame oil
a little black pepper
tsp apple cider vinegar


3/4 cup water


directions:


1. put all the ingredients in the food processor except for the water
2. pulse a few times to mix thoroughly
3. pour the water in all at once, and turn the processor on full
4. allow it to mix thoroughly
5. remove the resulting rubbery mass


part 2)
ingredients:


rubbery mass from part one
medium sized pot
water to cover the rubbery mass
seasonings -- salt, honey, soy sauce etc.


directions:


1. put rubbery mass and water and seasonings in the pot, and cover.
2. bring the liquid to a simmer
3. simmer for 90 minutes, turning half way if possible


The resulting gluten (seitan) will no longer be rubbery, but will be tender, chewy, and flavourful, and ready to be cut into pieces and used anywhere you might use meat or tofu. It's great in stirfry, makes a groovy pot roast (absorbing flavours very well).


This takes a long time, but the actual amount of work involved is very brief. The rest of it is just gentle cooking time.


Saturday, 16 October 2010

A Saturday Morning Muffin


MMMMMMMMUFFINS ...


I really like having easy, convenient, wholesome, and tasty snacks available for hands little and big. We like to have tea and treats with our friends after music class, so I threw these together. Very easy, and super yummy.

ingredients:

1/4 cup extra virgin coconut oil
1 1/4 cups filtered water (warm)
2 tsp egg replacer + 1/4 cup filtered water (or 2 large eggs)
1/4 cup coconut palm nectar
1 tbsp vanilla
1 tbsp apple cider vinegar

1 tbsp cinnamon
1 tsp sea salt
1/4 cup flax meal
1 cup blanched almond meal
1 cup pecan meal
1/4 cup carob powder
1/2 tsp baking soda
1/2 cup kamut flour (whole grain and fine texture)


1/2 cup to 3/4 cup raisins

directions:

preheat the oven to 345

1. combine the wet ingredients
2. add the dry ingredients in the order listed, mixing after each addition
3. add the raisins
4. spoon into 24 prepared muffin cups -- if you don't use silicone, I recommend using paper liners
5. bake for 35 minutes at 345 or until the tops spring back when lightly poked.

Enjoy with tea and friends ...


Friday, 15 October 2010

How To Cook a Really Good Chickpea


A CHICKPEA BY ANY OTHER NAME: CHANA, GARBONZO, CECI BEAN, INDIAN PEA, POIS CHICHE ... 

I believe that a lot of people prefer to open a can of chickpeas than to cook them from dry themselves. If you fall into the former camp, I thought I'd share with you just how easy it is to cook them. And to be honest, the taste is quite superior in my experience. And you can control what else goes into them in terms of salt and preservatives, BPA, heavy metals etc.

I live right off Little India in the Big Smoke, so my area is a cornucopia of really good chickpeas (and mangoes), and you can buy a couple of kilograms of the cute little suckers for just a few dollars.

Unfortunately, using chickpeas that you cook yourself requires a little planning and foresight, because they are by no means an instant food.

So, if you use chickpeas by the can because they are ready in 30 seconds or less, my recipe will certainly not convert you. However, if you are intimidated by the idea of cooking them, please read on.

Phase one:

ingredients:

4 cups of dried chickpeas
1 big pot
2 L of water

directions:

1. pick through the chickpeas and get rid of any stones you might find, or any peas that look suspect. 
2. give the peas a rinse
3. put the peas in the pot with the water
4. put them on the stove, and turn it on
5. bring the water to a boil
6. allow the peas to boil for at least 1 minute but no more than 3
7. remove the pot from the heat
8. allow the peas to soak in the water for at least 2 or 3 hours, or over-night

Phase 2:

ingredients:

soaked chickpeas
4 cups of water
1 tbsp sea salt
2 or 3 tbsp coconut oil

directions:

1. pour the water and chickpeas into a colander, and rinse the peas really well.
2. return the peas to the empty pot
3. add 4 cups of water to the pot
4. add the salt and coconut oil to the pot
5. put the pot on the stove and simmer the chickpeas for 1 or 2 hours, or until the water has been absorbed and the desired texture has been achieved

This recipe will make a lot of chickpeas. 
You will have enough chickpeas for your next meal, some to share, and plenty left to throw in the freezer.
You might as well make a lot and freeze them because cooking them takes so darn long ;)

Once you've made your chickpeas or stocked your freezer with them, you'll be ready to make some yummy chickpea and sweet potato samosas that have the power to make friends and influence people.

Tuesday, 12 October 2010

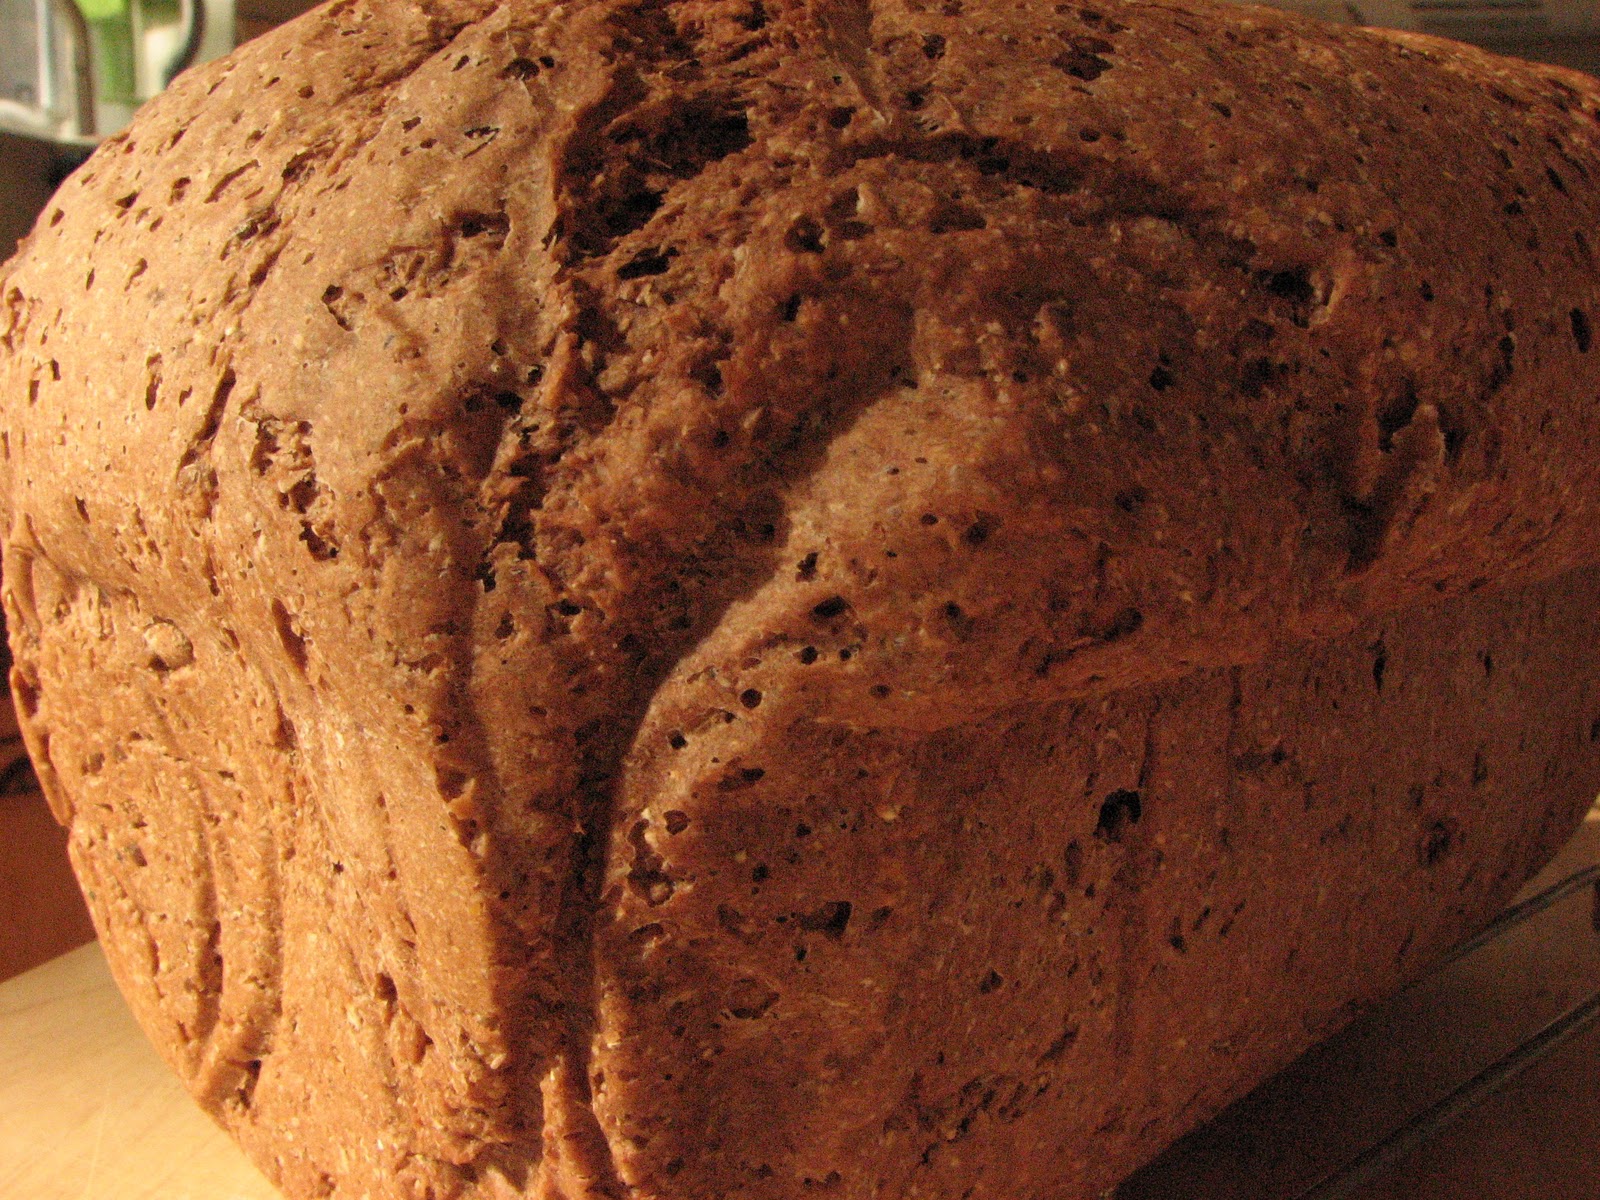
Really Good Bread


MOIST, WHOLE GRAIN BREAD

In our household, this bread is very popular. It stays moist for at least a week, which is in stark contrast to most whole grain breads we've made, which seem to become crumbly within a day or two. I'm not personally a proponent of the no-knead school of bread making. I'm not interested in debating anyone about it, but if the no-knead method works for you, you have my delight and admiration. My neighbour swears by the no-knead bread. He says you just keep a large quantity of the dough in your fridge for up to 2 weeks, and the appropriate bread texture and tooth occur as the gluten activates over time. I personally don't like the taste that develops in uncooked dough in the fridge after a single day, let alone a week :(
So, here's how I do it: I knead it. Or rather my mixer kneads it (my mixer's name is Obsidian Betelgeuse, and is a real workhorse). If you don't have a mixer, you can knead it by hand. I used to do that. It's pretty fun. I think that is what they mean when they say 'kicking it old school'.

ingredients:

1 1/2 cups warm water
2 tbsp raw honey
1 tbsp bread yeast

1/4 cup flax meal
1/2 cup spelt flakes
1/4 cup hemp flour (optional)
1 tbsp sea salt
3 or 4 cups Organic Red Fyfe Flour (we've also used whole wheat pastry flour with good results in this particular recipe, but the Red Fyfe gives it a little something extra. We purchase it at Bulk Barn)

directions:

1. Stir the honey into the warm water (think warm bath not hot drink temperature)
2. add the yeast to the water and stir. Set aside. It should grow foamy after a few minutes.
3. combine the dry ingredients (start with 3 cups of flour).
4. add the foamy yeast water to the dry ingredients and stir until combined
5. begin kneading, adding more flour as needed until ideal consistency. The ideal dough consistency I can best describe as slightly clammy but not sticky. The dough should feel resilient and somewhat elastic.
6. once the ideal consistency has been achieve, knead the dough for at least 15 minutes if you are using a mixer. You might want to knead for longer if you are doing it by hand. Then again, you might want to gnaw your own wrists off after 15 minutes if you are doing it by hand.
7. put the dough into a a bread loaf pan, cover with parchment and a damp towel. Put in a draft free, cozy place (like an oven that has been heated for a few seconds. 
8. Let the dough rise undisturbed for 90 minutes or so.
9. take the towel off, turn the oven on to 345 (leaving the dough in the oven while you preheat), and set the timer for 50 minutes. I like to bake my dough on a baking stone, because I like the effect it has on the bottom crust.

Sometimes I bake the dough freeform in long baguette sort of shapes on a baking sheet. But right now we're in a loaf pan groove. 

Enjoy warm from the oven and sing hallelujah. Super for sandwiches, brilliant for bruschetta, and tops for toasting.


p.s. we just ate slices of it with left over butternut squash soup ... yum! I'm the only heel lover in my house, so I don't even have to arm wrestle anyone. So spoiled ;)


variation: October 17. Today I made this bread sans Hemp flour with the addition of 1/4 cup raw cacao powder. Yum. :)


variation: February 5. I'm really into Chia right now. Probably due to the fact that I have a five pound bag. Added a 1/4 cup finely ground chia seed. No hemp flour.


Monday, 11 October 2010

Punkin' Pie -- Pumpkin Pie!


PUMPKIN PIE -- WITH A TWIST

The twist would be that it's not pumpkin. And it's vegan. And healthy. And won't spike your blood sugar. And rich, decadent, and delicious.

A month ago, at Highberry Farm up in Port Elgin, we were buying gourds and pumpkins with which to decorate our home in the t-dot. My husband noticed a sign for Pie Pumpkins, but misread it as Pumpkin Pies. Pie pumpkins they had, but no pies. The farmer that grew the pumpkins told me that he liked butternut squash for making pie, and the result was pretty much identical to pumpkin pie. On the strength of his assertion as well as my love affair with butternut squash, I decided to get a butternut and pie it. So, tonight we feast on pie made from Highberry butternut squash.


crust ingredients:


1 1/2 cups finely milled almond flour
3/8 tsp sea salt
3/4 tsp apple cider vinegar
1 1/2 tbsp extra virgin coconut oil
1 1/2 tbsp coconut sugar
1 1/2 tbsp filtered water


directions:
1. combine ingredients (I used a food processor, but certainly you can stir it by hand)
2. press 'dough' into a pie plate (lightly grease it ahead of time)
3. prick with a fork all over
4. bake at 345 for 15 minutes


pie ingredients:


2 cups cooked butternut squash (you can use pumpkin or another squash if you would like)
1 can (400 ml) organic coconut milk
1 tbsp vanilla extract
1/2 cup + 2 tbsp coconut sugar
1 tbsp cinnamon
1/2 tsp ginger
1/4 tsp nutmeg
1 tsp sea salt
a pinch of black pepper
4 tbsp arrowroot powder


directions:


1. puree all the ingredients together in a food processor, or you can mash and mix by hand if you like.
2. pour into half-baked pie shell
3. bake at 345 for 60 minutes, preferably on a baking stone or tile. I find this helps the crust achieve a desirable texture, and recommend it for all pie baking.


We served it with some leftover coconut milk-date-cinnamon-vanilla ice cream (my son is convinced that pie is merely a vehicle for ice cream), and it was pronounced a hit by pumpkin pie lovers of all ages.