Welcome to my crazy world of real food cooking ...

Eat Food. Not too much. Mostly Plants. -- Michael Pollan

I wish I could take credit for that because I think it sums up how we should eat. Simply -- eat stuff that really is food, instead of stuff that is food like substance. The supermarket is almost entirely food-like-substances, and, my friends, you should probably never ever eat them.

Fortunately, there is a world of deliciousness out there, and it can all be had in a way that not only doesn't harm your health, but in a way that benefits you hugely.

I think it's important to eat stuff that satisfies you, that keeps your blood sugar stable, and that gives you stuff your body really needs to run optimally.

But baby, it's gotta taste good.

I really like getting experimental in the kitchen. I love cooking, I love layering flavours, and I love coming up with really super yummy food. I have very strong opinions about what constitutes food, and there are a lot of things I won't touch in the kitchen. Bottom line? Pretty much everything I make is ridiculously good for you even if it tastes decadent. Although there are occasional big fat cheats ... but even those stick to real food, my friends.

For food that is usual gluten free, usually free of cane sugar, usually super low on the glycemic index, full of protein, fiber, flavour, and excellent energy, join me and Alice down the rabbit hole.

Every recipe on this blog is my own original effort and idea, so please pass 'em on, giving credit where credit is due.

Many thanks, and come back often. I'm really glad you are here!

:)

Saturday 29 January 2011

Vanilla Bean Ice Cream -- Sugar Free and Sublime

My ice-cream maker hard at work. Perhaps Saturn would be a good name for it.

The finished product (finished in terms of made, and half way to being finished in terms of eaten.)

I got some lovely milk and lovely cream from a farmer, and decided to make some lovely ice cream with it. My husband, as I mentioned, didn't get into the chocolate avocado ice cream at all. I thought ice cream made with milk and cream would be right up his alley. I wanted to use an alternative sweetener instead of cane sugar, and chose coconut nectar. Next time, I will try it with agave. The coconut nectar gives it a complex rich sweetness reminiscent of chocolate and maple syrup to my husband, and he thought this ice cream was really good. The coconut nectar taste is mellow and  fruity to me, so I thought the more intense and sharp sweetness of the agave would let the vanilla shine more brightly next time. Over all, some very nice ice cream that won't spike your blood sugar, and has all the good old fashioned melty deliciousness of good old fashioned ice cream -- and no chemical after taste (my main criticism of the ice cream we can buy in the store).


ingredients:

1 cup cream
1 1/2 cups whole milk
3/8 tsp sea salt
6 tbsp coconut nectar (or 4 tbsp clear agave)
2 tbsp xylitol (a low glycemic sweetener that occurs in birch trees among other things)
1 1/2 tsp ground vanilla bean (or 1 extra tbsp vanilla extract)
1 tbsp vanilla extract


directions:

1. combine all the ingredients
2. pour chilled concoction into your ice cream maker  and freeze according to the manufacturers instructions
3. volume will increase as it freezes, and will result in almost a liter when finished.
4. Enjoy as is, or top with a little chocolate sauce (that will have to be my next recipe, I think)

It's really enjoyable to eat ice cream that contains no texturizers, no thickeners, no artificial flavours, and no colouring agents. Once you get used to doing without it, you won't miss that chemical after taste at all ;).

YUM.


Gluten Free Raspberry Babycakes -- This week's Saturday morning muffin


Although I bake with almond flour a lot, and have ventured into entirely gluten-free cookies and crackers using almond flour and/or coconut flour exclusively, until now I've continued to add some kamut flour to my cakes and muffins. I thought it was time I tried a babycake using only almond and/or coconut flour. I decided to make raspberry babycakes, because I found some frozen raspberries that inspired me.

These turned out pretty well, with the cake light and sweet, and the raspberries tart. I think next time I will add a couple of table spoons of finely ground chia seeds, because I found the texture to be a little too delicate.

The over all taste is very nice, and I like the texture. They are moist and fragrant, and certainly good enough to share with guests.


ingredients:

1 1/2 cups water, warmed
1/4 cup extra virgin coconut oil
1/4 cup coconut nectar
2 eggs

1 1/2 tsp ground vanilla (or 1 tbsp vanilla extract)
1/2 tsp sea salt
2 tsp ceylon cinnamon

1 cup almond flour
1/2 tsp baking soda
1/2 cup + 2 tbsp coconut flour

1 1/2  cup frozen raspberries  (or frozen blueberries)


directions:

preheat oven to 345

1. melt the oil in the warmed water, then stir in the coconut nectar and the eggs
2. add the vanilla, sea salt, and cinnamon
3. stir in the almond flour, followed by the baking soda
4. add the coconut flour
5. when the batter is well combined, add the frozen berries (still frozen -- this will prevent them from 'bleeding' all over the muffins).
6. scoop the batter into 24 prepared muffin cups
7. bake for 60 minutes in an oven preheated to 345
8. when they are done, allow them to sit in the cups until they cool to firm up before removing them

Friday 28 January 2011

Baked Apples


I really like apples. I have fond childhood memories of going to orchards to pick our own machintosh apples. We'd climb the apple trees, and pick the ripest ones from the very top, their deep red skin and white flesh almost hot from the sun. Crisp and juicy they were, and we'd gorge ourselves on the drive home. Pesticides? What pesticides ;) Not that we didn't care about eating toxins, we were just joyfully oblivious.

Now I stick to organic apples, and often can find lovely organic royal gala at the Indian market up the street. When the apples are a little past their crisp prime, and have edged towards slightly mealy, the time for baking them is upon us.

This baked apple dish is practically an apple crisp without the crisp, an apple pie without the crust. For me, the best part of pie or crisp was always the apple filling, so it just makes it better having the apples with nothing else ;)


ingredients:

6 large royal gala apples (or medium if you prefer)
1/2 - 3/4 cup organic thompson raisins (depends on how much you like raisins)
1 tsp lemon juice (optional)
1 tbsp cinnamon
pinch sea salt
a little freshly grated ginger
1 tsp ground vanilla


directions:

1. combine all the ingredients in an oven-proof casserole. I like to use my magnificent cast iron 'Nemesis' for this. It bakes fruit and vegetables beautifully.
2. bake at 345 for 60 minutes with the lid on
3. turn the heat off and leave in the oven (if desired) for another 30 minutes

Please note that cooking times will vary with the type of casserole used, and if you are using glass, the cooking time might well be shorter, and you should probably just remove it at the end of cooking, instead of leaving it in. I doubled this recipe, and it worked very well.

This is lovely on it's own, or topped with a little whole milk yogurt.


Not Chocolate Ice Cream


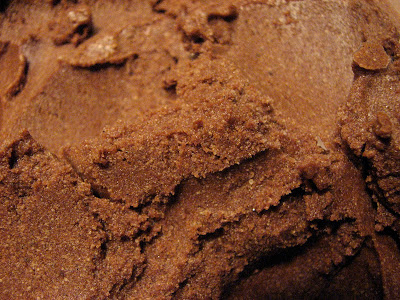
I thought it would be fun to make some chocolate ice cream using alternative ingredients. Mine involved some avocados, some coconut nectar, a few dates, some vanilla and cinnamon, and a vast quantity of raw cacao powder. The result: very creamy and very delicious. To me and my son, at least. We both love it. It was eaten with enjoyment by some others, but my husband dislikes it, possibly because he dislikes avocado in anything but sushi. If you like avocado, this might be as yummy to you as it is to me and my little one.


ingredients:

2 large ripe avocados
12 pitted honey dates
6 tbsp raw cacao
1/2 tbsp acai powder
1/2 tbsp maca powder
1/2 - 3/4 tsp sea salt
1 1/2 tsp ground vanilla (or 1 tbsp vanilla extract)
1/4 cup coconut nectar
2 tbsp xylitol
2 tbsp coconut oil
1 cup water


directions:

1. puree the ingredients with a hand blender until well mixed
2. put into an ice-cream maker and freeze according to the manufacturers instructions
3. makes 1 L
4. enjoy in small quantities -- very rich and very chocolaty


How I cook Kidney Beans


When it comes to the choice between dried beans and canned beans, I always use dried beans. I don't find it is much work to prepare them, although you do have to plan ahead. When I cook the beans, I tend to do a large quantity at once, and then freeze them in 2 or 3 cup portions labelled with the date. That way, it's almost as easy as pulling a can out of the cupboard, uses much less packaging, and doesn't have any dread additives and preservatives, or  BPA. And is very economical.

Here's how I cook beans:

1. put the beans in a large pot
2. rinse them with water, drain, and pick out any detritus such as stones or twigs (seriously), or discoloured or otherwise unappetizing looking beans
3. put the large pot on the stove
4. cover the beans with water (I use boiling water from the kettle)
5. bring the pot to a boil.
6. boil the beans for 1 or 2 minutes, then remove from the heat
7. allow to sit for 1 or 2 hours, or overnight
8. drain the pot and rinse the beans well, preferably in a colander
9. return the beans to the pot
10. add enough water to just cover the beans
11. add some coconut oil and sea salt
12. boil for 1 1/2 hours.
13. turn off the heat when the beans are soft enough, and hopefully all the water will be absorbed
14. enjoy as they are, add them to soup, cook 'em with rice, make a stew, etc.
15. freeze the extras in portions that will be good for adding to soup or stew, or eating by themselves.


Pizza -- the healthy way


Our friends joined us for a fun afternoon of games, followed by a dinner of pizza (and sauteed broccoli -- what can I say, it's broccoli mania here).
Instead of making the pizza in to turnovers, we ate it big and flat. And it was good.

I sauce generously, and use two kinds of cheese -- a boring but organic mozzarella, and some raw milk parmesan.

If you've tried my recipe for panzarotto, this recipe will seem familiar. I thought the pizza bore revisiting, because it's always well received, and before I didn't have any pictures of pizza, only of the panzarotto.  At last, voila, a pizza mosaic:

pizza mosaic


dough ingredients:

1 cup warm water
1 1/2 tbsp honey
2 tsp bread yeast

1 cup almond flour
2 cups kamut flour
2 tsp sea salt
1 tsp dried oregano
2 tbsp extra virgin coconut oil


directions:

1. combine the water, honey, and yeast, and allow to foam up
2. mix together the flours, salt, oregano, and coconut oil
3. add the yeast mixture to the flour mixture, and knead until it is a smooth dough
4. allow to rise for a while
5. roll 1/2 the dough flat on a piece of parchment-- this recipe will make to xl pizzas that each fill a standard baking sheet. Repeat with the 2nd half of the dough
6. transfer the flattened dough to baking sheets
7. cover the dough generously with sauce
8. cover the sauce generously with cheese
9. add other toppings if you like. We often like sauteed onions and grape tomato quarters. I think mushrooms might be nice, too. Go wild. 
10. bake for 30 or 40 minutes at 345, swapping the positions of the trays halfway through if you are baking 2 at once.
11. Eat with gusto or make your own pizza mosaic.

Thursday 27 January 2011

Green Soup Noodles -- Good For What Ails You part Deux


Well, I've already taunted you with tales of our delicious cold-fighting soup, so it's only fair that I now taunt you with these very easy to make noodles. These are our all-purpose noodles. Great as noodles with sauce. Great dough for making ravioli. Great in soup. Great tossed with a little coconut oil and sea salt and eaten with your fingers if you are a toddler. 

They are made with spinach, almond flour, and kamut flour, and are high in protein, no refined carbs, high in fiber, and taste really good. Unless you hate the colour green, in which case you might think they taste terrible. Really, though, they taste like noodles.

The process for making these noodles is very easy, however I have to say that the many step procedure for cutting the dough might make the whole undertaking seem like more work than it really is. Seriously, the hardest part was stopping to take pictures. And the most time consuming part was unrolling the spirals. Note to self: bully someone else into doing that next time.

This recipe is easiest using a food processor, however if you have a blender to puree the spinach, you can certainly do the mixing of the rest by hand. And you don't need a pasta roller to roll out these noodles. I like a noodle with bit of tooth, so I don't roll it out to transparent thinness anyway. A rolling pin works great and you're done in a jiffy. That's the theme of my cooking, you've probably noticed. It's gotta be fast ...


ingredients:

150 g frozen organic spinach, defrosted
1 organic egg (xl or l)
1/2 cup almond flour
1 tsp sea salt
1 1/2 cups (up to 2 cups) kamut flour (add the last 1/2 cup a bit at a time)


directions:

1. in a food processor, puree the defrosted spinach. If you are using fresh spinach, let me know how it turns out.
2. add the egg and combine
3. add the sea salt and almond meal, and combine
4. add 1 1/2 cups kamut flour, and pulse to combine. if more flour is needed to make a dough, add it a bit at a time. however, 1 1/2 cups might be enough to make a dough that is not too sticky.
5. gather the dough into a ball, flatten, wrap, and set aside to 'rest'.
6. divide the dough into 4 parts
7. roll each part on a mat sprinkled with kamut flour, using a rolling pin sprinkled with kamut flour.
8. if the dough is too sticky, add more kamut flour
9. roll the dough out until it is nice and thin
10. make sure the surface is well sprinkled with kamut flour, and roll it up 
11. set the roll aside and repeat with the other portions of dough
12. once all the portions of dough have been rolled up, cut them into spirals using a sharp chef's knife or bread knife (I prefer a bread knife because the serrated blade makes this task easier)
13. uncoil the spirals and lay them out
14. put the noodles in boiling water spiked with oil, and cook for 2 minutes
15. remove the noodles, put them into bowls, and ladle hot soup over them
16. store extra uncooked noodles in an airtight container

variation: Just for fun (and extra substance since my son refuses sauce with his noodles), I decided to increase the almond meal to 1 cup instead of 1/2. Because I added the kamut flour last, this didn't affect things, and only very slightly reduced the flour content. Also, I ran out of kamut, and had to add in a little whole wheat pastry. Which worked fine. They always seem to taste the same. And texture wise, they were brilliant. As always.


Ready to roll


Nice and thin

Rolling up the rolled out dough

A spiral

Three rolled up portions of dough

Cutting them efficiently with a serrated blade

Spirals before they are unrolled

After the unrolling, and ready to boil

The noodles close up

Ready to put away for tomorrow, uncooked

Cooked, and ready to eat, or to put soup on!


Not Chicken Noodle Soup -- Good for what ails you Part 1 (crockpot soup)


My not quite 3 year old (six weeks to go) woke up in the night with a low fever (his first one I think), and wasn't feeling well when we got up this morning. So, not chicken noodle soup to the rescue.

You may be familiar with the potent anti-viral effects of ginger and turmeric, but did you know turmeric also contains salicylic acid, which can be found in willow bark and is used to make asprin? Salicylic acid is a common compound found in many plants, and has an anti-inflammatory effect. Organic vegetable soup has been shown to have higher levels of salicylic acid than non-organic vegetable soup (but I'm not going to cite the study. You can google it if you'd like.) Suffice to say it's not the chicken soup but the vegetables in the chicken soup that were good for what ails you. We've updated it by forgoing all chicken, and adding plenty of ginger and turmeric for both the anti-inflammatory effects as well as the anti-viral effects.

Plus what could be more soothing that a hot bowl of soup when you are sick?

I decided to make soup noodles to go with the soup. For this I used my favourite pasta dough recipe, rolled it flat, rolled it up, and sliced it quickly. Two minutes in boiling water and voila. Honestly, it takes longer to tell you about it than it takes to make them.

I ended up throwing in some broccoli after the soup was finished. Broccoli is practically a religion around here. And although I was originally going to just make a clear soup with celery and carrots in it, I ended up throwing in some red kidney beans too. Kidney beans are a good choice because they are contain some essential trace elements, lots of protein, and are great for stabilizing blood sugar. Plus they taste good. 

Well, the soup turned out well, and we enjoyed it for dinner. At least, my husband and I did. My son, noodle lover extraodinaire, refused even a bite -- and didn't even have appetite for his Not Chocolate Ice Cream, which he normally adores. :(


ingredients:

2 tbsp extra virgin coconut oil
1 1/4 cup diced carrots
1 1/4 cup diced celery
1 1/2 tbsp finely minced garlic
1 cup finely chopped onion (purple)
125 g cauliflower, cut into florets, approx 1 heaping cup
1/2 tbsp turmeric
3 1/2 tbsp fresh ginger, minced
2 tsp sea salt
black pepper

1 1/2 cups dark red kidney beans (cooked, not raw. Or canned, if you prefer)
1/2 tbsp marjoram
1/2 tbsp oregano
4 cups boiling water

125 g broccoli, cut into bite sized pieces (optional) (I used frozen, defrosted) (or you can use lightly-steamed) approx 1 heaping cup


directions:

1. saute the garlic, onion, celery, carrot, cauliflower, ginger, turmeric, sea salt, and pepper in the coconut oil on low for 30 minutes, or until very cooked.
2. put the sauteed vegetables into your crock pot, and add  the kidney beans, marjoram, oregano, and water
3. cook on high in your crockpot for 4 hours
4. turn off the heat and add the broccoli
5. let sit for 30 minutes, or over night.
6. ladle hot soup over cooked noodles, and serve 

:)


Enoki Mushrooms baked with ginger -- another new friend for the king mushrooms


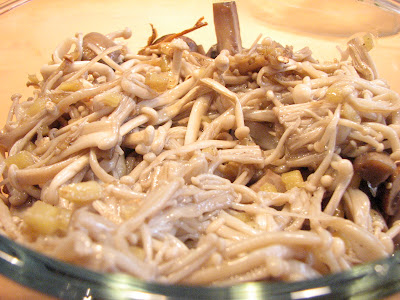
I tried the enoki mushrooms from enviro-mushrooms in burlington, and received a box of white mushrooms in our organics box. I knew it was time to do a mushroom bake. I was right! Ginger, sea salt, and coconut oil rounded out the concoction to a perfect finish. So good.

ingredients:

2  x 6.5 oz boxes of enoki -- trimmed and separated into clumps
 1 x 8 ox box of white mushrooms -- cut into quarters
2 tbsp coconut oil
1/4 -1/2 tsp sea salt
black pepper
2 tbsp fresh ginger finely chopped


directions:

1. combine all the ingredients in an oven proof casserole
2. bake at 345 for 30 minutes covered
3. remove the cover and bake for 30 minutes longer
4. serve with your rainbow chard saute and you will make new friends


Rainbow Chard -- not just for discos and pride parades


We recently decided to try a box delivery from an organic delivery company. It was kind of nerve wracking and kind of exciting to imagine what they might include in our box, because we didn't get to choose.

Our box included a very pretty bunch of rainbow chard, and you'll have to forgive me for including too many pictures of this eye candy.

I came up with a very tasty recipe today, inspired in part by a discussion with Iantha about what to do with her rainbow chard last week.

Turned out great -- I think even my husband will like it :) (He finds almost every green vegetable too bitter if it's not broccoli, which is why we eat so darn much of the broc.)


ingredients:

1 bunch of rainbow chard (or other swiss chard is great too), cut into thin slices (the leaves will end up in ribbons)
1/4 cup pecan pieces
1/4 cup organic thompson raisins
1/4 - 1/2 tsp sea salt (the size of your bunch and the saltiness of your sea salt will be factors. start with less)
1 tbsp coconut oil
a dash of nutmeg
some black pepper


directions:

1. saute the pecans and raisins in the coconut oil on low heat for 5 minutes
2. add the chard and sprinkle with sea salt, nutmeg, and black pepper, toss with the nuts and raisins, and saute for 5 more minutes
3. voila!

This allowed the chard to stay crisp, with the leaves wilted enough to be fully flavourful.

Soooo good. :)


Tuesday 25 January 2011

Little Lime Cookies -- gluten free, dairy free, sugar free, and optionally vegan


As I am always on the trail of the elusive perfect cookie -- health speaking -- I made these. They are a sweet and tasty treat that will please a moderate sweet tooth but won't spike your blood sugar. They are gluten free, dairy free, high in protein, and made with sugar alternatives that are low on the glycemic index and good for your health. In addition to being high in protein because they are made with almond flour and coconut flour, they are also made with ground chia seeds, which in addition to being a nutritional power-house, have an almost miraculously stabilizing effect on blood sugar. And the cinnamon helps regulate blood sugar as well, in addition to being a yummy flavour boost.

Our friends Kim, Brooke, and Claire joined us for an afternoon of games followed by a pizza dinner. This presents a good challenge to me because in addition to being a diabetic, Brooke as well as Kim have a selective diet. So, I always feel like I've attained quite a success when Brooke pronounces something I've made as tasting good. He's always amazed the treats I can offer him that won't adversely affect his blood sugar.

I whipped up a batch of oven roasted cashews, these little lime cookies, a couple of pizzas, a big bowl of sauteed broccoli, and chased it all with some chocolate 'ice cream' that is so creamy and rich and yummy you'd never guess it's good for you.


ingredients:

1/4 cup coconut oil
1/4 cup lime juice
1/4 cup coconut nectar
1 egg (or 1 tsp egg replacer + 2 tbsp water)

1 1/2 tsp ground vanilla (or 1 tbsp vanilla extract)
2 tsp cinnamon (ceylon or other)
1/4 tsp sea salt
1/4 cup finely ground chia seeds (aka salba seeds)

1 cup almond flour
1/4 tsp baking soda
1/4 cup coconut flour

coconut sugar or xylitol for rolling (optional)


directions:

1. preheat the oven to 345
2. warm the coconut oil to melt it
3. mix the coconut oil, coconut nectar, lime juice
4. add the egg or egg replacer mixed with water
5. add the sea salt, vanilla, cinnamon, and chia seed
6. stir in the almond flour
7. stir in the baking soda
8. finally add the coconut flour, and mix thoroughly
9. make the dough into small balls, and roll each ball in a saucer of either coconut sugar or xylitol
10. flatten each ball onto a lined baking sheet
11. bake at 345 for 20 minutes

makes one baking sheet full -- cookie size can vary according to your preference

Sunday 23 January 2011

Herbed Poppy Seed Biscuits -- Gluten free, high in protein, and tasty


These little tasty morsels can be rolled into balls and pressed flat into biscuit form, or rolled flat between sheets of parchment with a rolling pin, and cut into squares. I personally prefer the biscuit form having tried both. The biscuits are tender, flaky, and delicate.

These have no grain flour, and are made up entirely of seeds, nut flour, and coconut flour. The are a great snack, and go well with our chickpea, tomato, and vegetable soup. They are dairy and gluten free, and contain no sugar or other sweeteners. In addition, chia seed helps keep blood sugar levels stable.


ingredients:

2 tbsp coconut oil
1 egg
4 tbsp water
1 tbsp apple cider vinegar

3/4 tsp sea salt
1 tbsp oregano (or other herbs you like would be fine)
black pepper 

1/4 cup ground flax seeds
1/4 cup ground chia seeds
1 tbsp poppy seeds

1 cup almond flour
1/4 tsp baking soda
2 tbsp coconut flour


directions:

preheat the oven to 345

1. melt the coconut oil in warmed water
2. add the vinegar, and making sure it's not hot anymore, add the egg and combine well
3. add the sea salt, pepper, and herb of your choice
4. add the flax, chia, and poppy seeds.
5. add the almond flour and baking soda
6. add the coconut flour, and mix well
7. after the dough has formed into a smooth mass, it is ready.
8. roll the dough into small balls and flatten them onto a lined baking sheet
9. bake at 345 for 20 minutes.

makes one baking sheet full of biscuits

yum :)

P.S. I think that with just a modicum of modification, this recipe will make a divine gluten free pizza dough ... I'll try it and let you know.