Welcome to my crazy world of real food cooking ...

Eat Food. Not too much. Mostly Plants. -- Michael Pollan

I wish I could take credit for that because I think it sums up how we should eat. Simply -- eat stuff that really is food, instead of stuff that is food like substance. The supermarket is almost entirely food-like-substances, and, my friends, you should probably never ever eat them.

Fortunately, there is a world of deliciousness out there, and it can all be had in a way that not only doesn't harm your health, but in a way that benefits you hugely.

I think it's important to eat stuff that satisfies you, that keeps your blood sugar stable, and that gives you stuff your body really needs to run optimally.

But baby, it's gotta taste good.

I really like getting experimental in the kitchen. I love cooking, I love layering flavours, and I love coming up with really super yummy food. I have very strong opinions about what constitutes food, and there are a lot of things I won't touch in the kitchen. Bottom line? Pretty much everything I make is ridiculously good for you even if it tastes decadent. Although there are occasional big fat cheats ... but even those stick to real food, my friends.

For food that is usual gluten free, usually free of cane sugar, usually super low on the glycemic index, full of protein, fiber, flavour, and excellent energy, join me and Alice down the rabbit hole.

Every recipe on this blog is my own original effort and idea, so please pass 'em on, giving credit where credit is due.

Many thanks, and come back often. I'm really glad you are here!

:)

Saturday 9 April 2016

Sour Dough -- the return of the monster

Almost 2 years after I took a break from making sourdough, I took my dormant monster out of the freezer. When the contents of the jar  defrosted, it smelled heavenly -- that sour sweet smell of a healthy happy sourdough starter. Ah, fermentation, my good friend.

After a few days of regular feedings, the bubbling beast was ready to get to work. I made bread! Kamut flour with oat bran and whole chia seeds. Why? I don't know. It was a thing of beauty. I baked it in my cast iron dutch oven like a good little sheeple, and lovely bread was the result. Since then, I've done freeform loaves on a baking sheet, baked in an oven with a bowl of water for extra steamy goodness.

I've thrown in steel cut oats as well as oat bran, just out of curiosity. I like a bread with a bit of 'tooth' to it. Not so much that it, you know, bites back, but still.


just after feeding


just after feeding


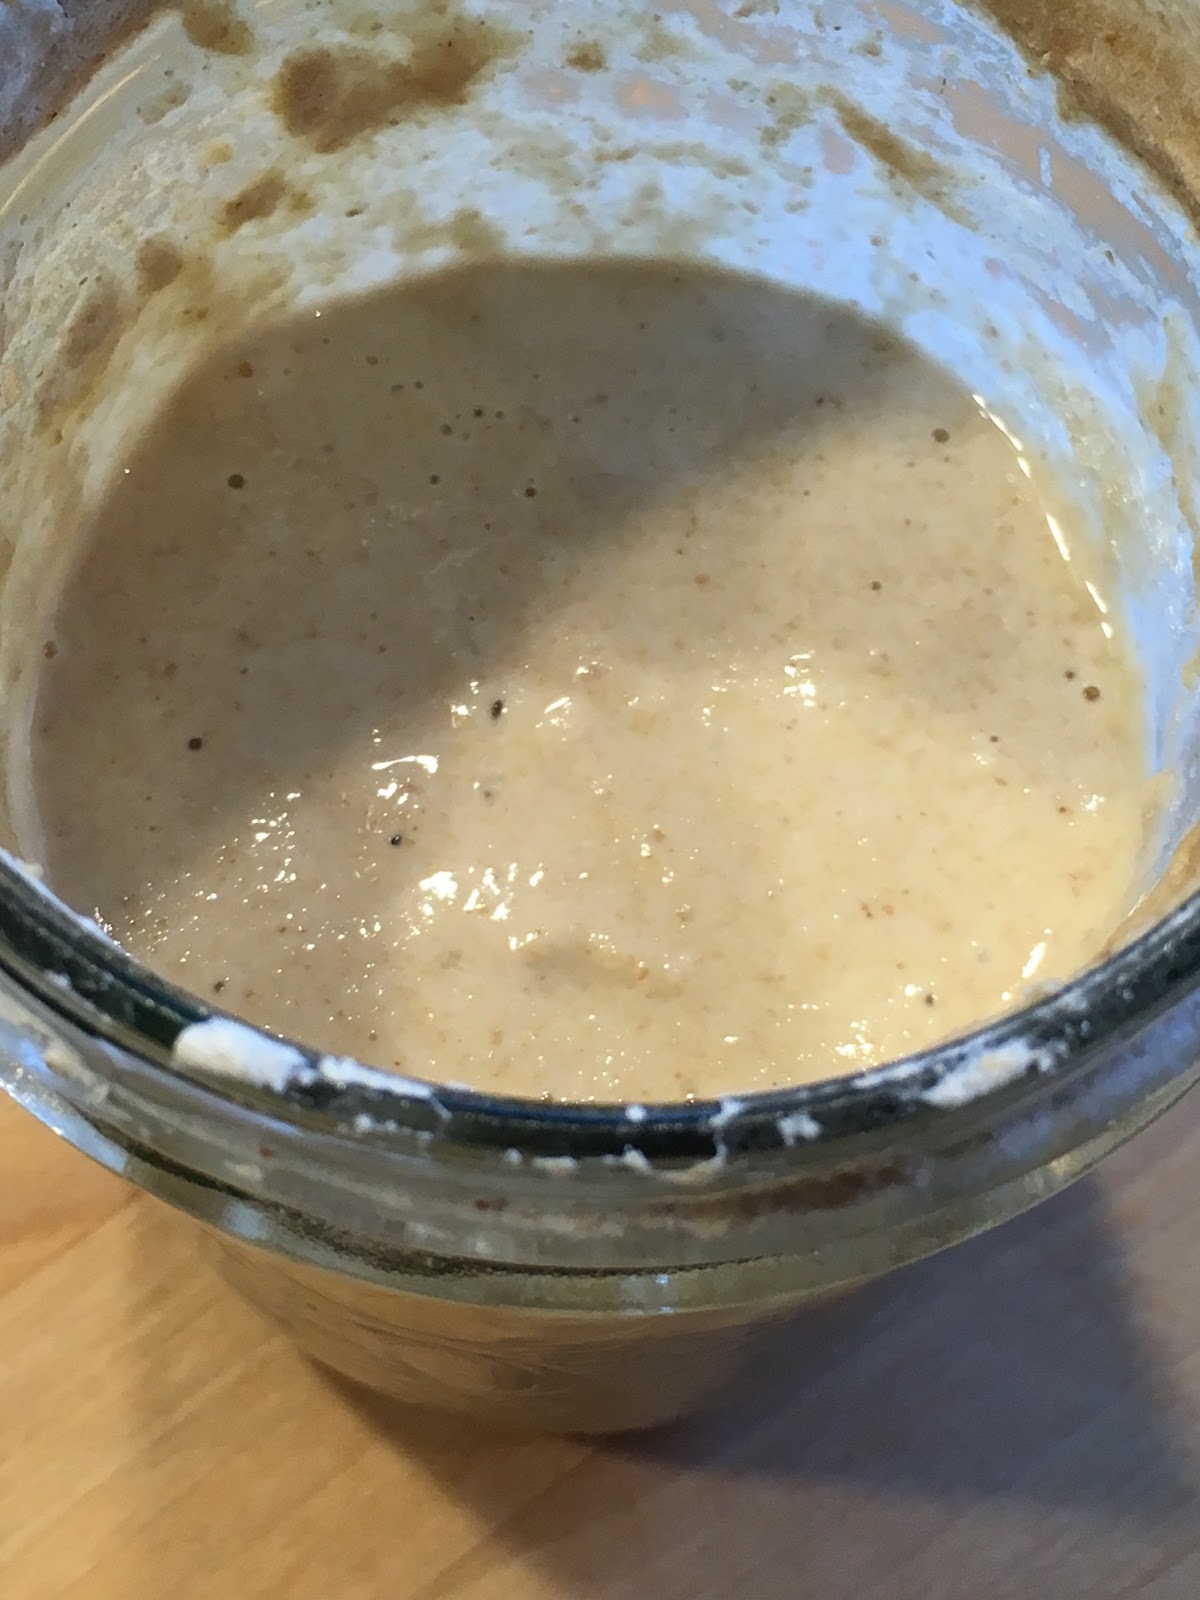
a couple of hours later -- lots of action


fluffing up, full of bubbles -- happy starter!!


Make your own starter:

1. in a clean glass container (like a wide mouth mason jar) combine equal weights of flour and water, and stir it into a sloppy sloopy  pasty slurry. I use a kitchen scale for this endeavour. I have started using spelt flour, I have also fed it on kamut flour. I am not a white flour person. I have never been a white flour person. If you want to do yours with white flour, I bet your resulting loaf will look a lot prettier than mine.
2. mix the four and water well, and cover with a clean cloth (I use a small dishcloth, secured with an elastic. This is just me. I don't know what real bread makers do)
3. 'feed' this incipient levain with equal weights of flour and water every 12 hours. Or every 24 hours. Experiment with this. It will change the taste of your bread because frequency of feeding selects for proliferation of different organisms, some sweeter, some more sour.
4. after a week or so, your starter should smell fermenty, sweet and sour, and be bubbly and swell up in the jar. If it smells bad, or looks mouldy, throw it out and start again!
5. When the starter swells up and puffs up between feedings, you know you are good to go. Like a well roasted vegan marshmallow. Poof!!


Bake your own bread:

Here's what I'm grooving on right now:


ingredients:

1 cup HUNGRY sour dough starter -- don't have fed it since the night before
2 cups water


2 tsp sea salt
1 cup oat bran
1/4 cup whole chia seeds

3 (-ish) cups kamut flour

(I added 1 cup of steel cut oats to my last creation.  In addition to the oat bran. Yes, I'm a weirdo. Like! Love!! That's just me, though. If you are a white flour person, you might like a lighter, daintier loaf.)


directions:
(I'm a big fat cheater, and no matter what anyone tells you otherwise, it's true.)

1. mix together all your ingredients, and add enough flour to get a somewhat sticky dough that holds together perfectly.
2. either place in a cast iron pot lined with parchment, close the lid and allow to rise
or
shape into loaves on a silicone baking mat, cover with parchment, cover with a wet towel, and allow to rise.

3. give it between 4 and 12 hours if possible.

I made free form loaves on a silicone mat on a baking sheet. I kind of rolled them around in oat bran. to make them look cute. It's like makeup. Not essential. Looks fetching sometimes.

I let them rise until I ran out of time. More rising is good. Some people let it rise then knead it and fold it. I'm way too lazy for extra steps. Busy. I'm way too busy, I mean.

Rise for 8 hours if possible.

******make sure you feed your residual starter now that you've harvested enough to make your bread!!!!! A hungry monster is not a happy monster. *******

bake at 345 for 1 hour if in a cast iron pot
bake at 345 for less time if you've shaped two free form loaves on a silicone mat on a baking sheet. Maybe 45 minutes!

This is what I did. But like I said, I'm a big, fat cheater. Ole!!


Monday 4 April 2016

Where Brownies Fear to Tread -- vegan brownies

We really do make the most amazing brownies. They are dense and fudgey, chewy and utterly satisfying. This are made without refined sugars, and are gluten free. I use either raw almond flour or finely ground raw sunflower seeds for these. Raw sunflower seeds can be reduced to a delicate powder in a seed or coffee grinder, so they have an ideal texture for baking. Beautiful, really. And the flavour is calm enough that it doesn't balance of whatever you put them in. Pumpkin seeds -- aka pepitas, bless their little green hearts -- have  such a strong flavour that you must use them purposefully, not just as an alternative. Yes, so these ones. These brownies. A few tweaks here and there, the recipe evolves a little. But they are great. Next time I'll grind up a couple of espresso beans with the chia seeds, and maybe a chili flake or two. You know, for fun.


equipment needed:

hand blender -- aka immersion blender
seed grinder -- or coffee grinder
mixing bowls
mixing spoons
measuring cups
measuring spoons
kettle for boiling water
oven
2 square silicone baking pans (8x8 each)
cooling rack


ingredients:

a)
1 1/2  cup pitted honey dates
1 1/2 cups boiling water
1/2 cup extra virgin coconut oil 

1 cup coconut nectar
1 tbsp apple cider vinegar
1  tsp vanilla extract 

b)
1/2 cup hemp hearts 


c)
1/2 cup tapioca starch
1/4 cup chia seeds, finely ground
1 cup raw almond flour or finely ground sunflower seed flour
1/4 cup coconut flour

1/2 tsp ground vanilla 
1/2 tsp sea salt
1 tsp baking soda
2 tsp cream of tartar

1 cup raw cacao powder


d)
coconut sugar to sprinkle on top -- use plenty, it's awesome that way.

directions:
preheat the oven to 345

1) in a mixing bowl, put your ingredients from part a) and let them sit for 10 minutes. Add b) and let sit for another 10 minutes at least. If your dates start out very hard, give it longer. Give it an hour!!
2) in a separate bowl, combine your ingredients from part c). Make sure they are really well stirred together
3) when your dates are super soft and saturated, use your immersion blender to puree the concoction to  smooth and velvety perfections
4) mix your puree and your ingredients from part c) together
5) divide evenly between 2 square silicone pans (or a large rectangular is fine if that's what you've got)
6) sprinkle a tbsp or so of coconut sugar on top of each pan before you put them in the oven
7) bake for 50 minutes at 345
8) cool before cutting and removing from the pan

Friday 1 April 2016

Chocolate Cream Eggs -- vegan, unrefined, and utterly delicious

I remember eating a Cadbury cream egg as a kid. Man those things are sweet. I always liked the idea more than I liked the reality. Too sweet, no flavour. These ones, dear friends, taste really good. The centre is a creamy, smooth concoction that includes maple and cashew cream. The outer shell is a organic, fair-trade dark chocolate. I used a 71% chocolate made by cacao berry. This one melts beautifully. Some chocolates with higher cocoa content may not melt to a liquid state, making them harder to work with. Use a double boiler!! Use a double boiler use a double boiler use a double boiler.

The combination of the dark chocolate flavour with the maple cashew is just right. It's more sweetness than I can handle often, but really amazing. And certainly a much more body-friendly and environmentally sound option than the commercial preparation.


My fellahs and family all enjoyed very much.

I got little silicone moulds, and made half eggs. I made a few whole eggs, but that's really more cream egg than I really liked. Hard to use. Too big around. Too much commitment. The half eggs were perfect.


equipment needed:

double boiler
food processor
moulds for egg shape
mixing bowl
mixing spoons
measuring cups
measuring spoons


ingredients:

a) fair-trade organic dark chocolate, like cacao berry. Did you know that a lot of chocolate is harvested using slaves and slave-children. True story. Go for fair-trade, friends.

b)
1 cup raw cashews -- soaked for a few hours in filtered water with a little sea salt and then rinsed
1/2 cup maple syrup
1 tbsp agave (or honey if you're not vegan)
4 tbsp coconut ol
1 tsp vanilla extract
1/4 tsp sea salt

c)
turmeric


directions:

put your mould in the freezer to pre-chill

1. in a food processor, combine the ingredients in b)
2. pulse until chopped up, then  process until as smooth as possible. The smoother the better!!
3. set a little of the mixture aside to combine with enough turmeric to make your 'yolk' colour.
4. chill the filling -- it will firm up and be easier to work with, imho

5. in a double boiler, melt your chocolate. I used about 2 cups total chocolate for these eggs, and had a little of the cashew cream mixture left over but was tired of making eggs by that point so ....
6. I painted the moulds using a silicone pastry brush, but some people spoon it in. Let it chill a few seconds, and then sluice the chocolate around the moulds. Practice until you find a technique that works for you!
7. When the chocolates thick enough, scoop a little white and a little yolk colour inside.
8. spoon a little melted chocolate over top of the filling to close it. Pop it in the freezer to firm up.
9. Gently remove from the moulds.
10. I kept them refrigerated.
11. The cashew cream filling will be quite soft and creamy at room temperature, and a little more firm when chilled. You can see which way you like them best.

Chocolate Oatmeal Chocolate Chip Soft Cookies

What happens when you throw a bunch of stuff together in a bowl? Well, sometimes something like this: soft, vegan, oatmeal chocolate cookies with chocolate chips. You had me at cookie.


equipment needed:
baking sheets
silicone baking mats or parchment
mixing bowl
mixing spoon
measuring cups
measuring spoons
seed grinder


ingredients:

a)
2 cups scotch oatmeal
1/2 cup tapioca starch
1 cup shredded coconut
1/4 cup ground chia seeds
1/2 cup raw cacao powder
1 cup coconut sugar
1/2 cup date sugar

b)
1/2 tsp sea salt
1/2 tsp ground vanilla bean
1 tsp baking soda
2 tsp cream of tartar

c)
2 cups water

d)
1 cup chocolate chips


directions:

preheat the oven to 345

1.  combine ingredients from a) and b) in a large mixing bowl
2. mix well
3. add c) and mix very well
4. finally stir in part d) and mix well
5. scoop by small spoonful onto a lined baking sheet
6. bake for 15 to 20 minutes at 345
7. makes approx 4 dozen small cookies

Soft Oatmeal and Raisin Cookies -- vegan, nut free, and easy

These are very soft, very yummy, and quick to make.

I made some chocolate chocolate chip oatmeal the other day. The cacao powder in the mix made the batter thicker, so I found myself adding a little pea protein powder to this one to adjust the texture. Delicious, and dare I say nutritious.

I've been into the super minimalist ingredients lately -- like the mashed banana, oatmeal, and chocolate chip. These are a little more involved. But delicious.


equipment needed:

baking parchment or silicone baking mats
baking sheets
mixing bowl
measuring cups
measuring spoons
mixing spoon
seed grinder


ingredients:

a)
2 cups scotch oatmeal
1/2 cup tapioca starch
1 cup shredded coconut (organic unsweetened)
1 cup coconut sugar
1/4 cup ground chia seeds
1/4 cup pea protein powder

b)
1 tsp cream of tartar + 1/2 tsp baking soda
1/2 tsp sea salt
1 tsp ground ginger
1 tbsp ceylon cinnamon

c)
2 cups water
1 tsp vanilla extract

d)
1 cup organic raisins


directions:

pre-heat the oven to 345 degrees

1. in a large mixing bowl, combine all the ingredients from a) and b)
2. when this mixture is completely integrated, add the ingredients from c) and mix well
3. add the raisins
4. stir well, and let sit for a few minutes
5. scoop spoonfuls of batter onto a lined baking sheet, don't flatten
6. bake for 15 to 20 minutes at 345

(I baked it for 20 minutes when there were 2 trays in the oven, swapping their positions halfway through the bake. I baked a single tray for 15 minutes.)

I got 4 dozen small cookies from this recipe!