My son is a bread lover. And because of a variety of health issues, he has had to go gluten-free, to his chagrin. However, this rather credible loaf makes things a little easier. This is version 4, and it's got a wonderful texture. He also loves version 2. This one has chia, which makes this bread a little more suitable for use by people who have blood sugar issues. This bread dough doesn't have the same texture as gluten-containing bread. You have to scoop it into the bread pan as a sticky mass instead of as a clammy, well-behave dough ball. However, it rises well enough to become nicely spongey, and developed a pleasing crust when baked. The taste is enjoyable, and it toasts up beautifully. Finally, it mixes up in just a few minutes, and is very easy to make.
equipment needed:
oven
loaf pan
ingredients:
a)
1 1/2 cups warm water
1/4 cup coconut sugar
1 tbsp bread yeast
b)
1 cup sorghum flour
1 1/4 cup buckwheat flour
1/2 cup tapioca starch
1/4 cup ground chia seeds
c)
1 1/2 tsp sea salt
2 tsp xanthan gum
1 tbsp psyllium husk powder
directions:
1. combine the ingredients from a) and set aside
2. in a larger bowl, combine b) and c), and mix until completely and evenly dispersed
3. when a) has foamed up, add it to the mixture of b) and c), and mix quickly and well
4. put the resulting stiff batter into a prepared loaf pan, and smooth the top of it
5. cover it and let it rise for 1 1/2 or 2 hours
6. bake at 345 for 1 hour
7. turn out of the baking pan and let cool on a rack
8 when fully cool, store in an airtight package in the fridge.
Smart whole food. Kid approved, grownup enjoyed, good for your body and your world.
Welcome to my crazy world of real food cooking ...
Eat Food. Not too much. Mostly Plants. -- Michael Pollan
I wish I could take credit for that because I think it sums up how we should eat. Simply -- eat stuff that really is food, instead of stuff that is food like substance. The supermarket is almost entirely food-like-substances, and, my friends, you should probably never ever eat them.
Fortunately, there is a world of deliciousness out there, and it can all be had in a way that not only doesn't harm your health, but in a way that benefits you hugely.
I think it's important to eat stuff that satisfies you, that keeps your blood sugar stable, and that gives you stuff your body really needs to run optimally.
But baby, it's gotta taste good.
For food that is usual gluten free, usually free of cane sugar, usually super low on the glycemic index, full of protein, fiber, flavour, and excellent energy, join me and Alice down the rabbit hole.
Every recipe on this blog is my own original effort and idea, so please pass 'em on, giving credit where credit is due.
Many thanks, and come back often. I'm really glad you are here!
:)
Showing posts with label chia. Show all posts
Wednesday, 25 October 2017
gluten free bread v 4.0
Labels:
bread,
buckwheat,
chia,
gluten free,
nut free,
psyllium,
sorghum,
tapioca,
vegan,
xanthan gum
Chocolate Monkey Cookie Bars -- delicious vegan, gluten free, and nut free banana and chocolate treats
There's no such thing as a bad banana in this house. My fellas both love eating them, but if they ever hang around too long, they can fulfill their destiny as delicious cookie bars.
These are nutritionally dense, full only of high octane fuel. I like to throw a couple of these in my son's lunch box because with all the excellent ingredients, I know they'll help him power through the day at school. Additionally, they taste great, so he looks forward to them.
equipment needed:
oven
2 8x8 square baking dishes -- (I like silicone but if you don't use silicone, make sure you prepare it well so the batter doesn't stick)
mixing bowl
mixing spoon
seed grinder for chia or buy already ground
measuring cups
measuring spoons
ingredients:
a)
2 cups mashed overripe banana
1/2 cup date sugar
1 tbsp apple cider vinegar
1/2 tsp vanilla extract
b)
1 tsp xanthan gum
1/2 tsp ground tonka bean (optional!)
1 tsp cream of tartar
1 tsp baking soda
1/2 tsp sea salt
c)
1/4 cup raw cacao
1/4 cup tapioca starch or green banana flour
1/4 cup ground chia
d)
2 cups shredded coconut
e)
1 cup fair trade chocolate chips
directions:
1. preheat the oven to 345
2. combine the ingredients from part a) -- you may want to use a whisk
3. whisk in the ingredients from part b)
4. whisk in the ingredients from part c)
5. stir in the shredded coconut
6 stir in the chocolate chips
7. divide evenly between prepared 2 square pans (or use a big rectangle one!)
8. bake at 345 for 45 minutes or until they are done
9. score into bars while they are in the pan, allow to cool, and then remove.
10. Store in an airtight container in the fridge
These are nutritionally dense, full only of high octane fuel. I like to throw a couple of these in my son's lunch box because with all the excellent ingredients, I know they'll help him power through the day at school. Additionally, they taste great, so he looks forward to them.
equipment needed:
oven
2 8x8 square baking dishes -- (I like silicone but if you don't use silicone, make sure you prepare it well so the batter doesn't stick)
mixing bowl
mixing spoon
seed grinder for chia or buy already ground
measuring cups
measuring spoons
ingredients:
a)
2 cups mashed overripe banana
1/2 cup date sugar
1 tbsp apple cider vinegar
1/2 tsp vanilla extract
b)
1 tsp xanthan gum
1/2 tsp ground tonka bean (optional!)
1 tsp cream of tartar
1 tsp baking soda
1/2 tsp sea salt
c)
1/4 cup raw cacao
1/4 cup tapioca starch or green banana flour
1/4 cup ground chia
d)
2 cups shredded coconut
e)
1 cup fair trade chocolate chips
directions:
1. preheat the oven to 345
2. combine the ingredients from part a) -- you may want to use a whisk
3. whisk in the ingredients from part b)
4. whisk in the ingredients from part c)
5. stir in the shredded coconut
6 stir in the chocolate chips
7. divide evenly between prepared 2 square pans (or use a big rectangle one!)
8. bake at 345 for 45 minutes or until they are done
9. score into bars while they are in the pan, allow to cool, and then remove.
10. Store in an airtight container in the fridge
Labels:
banana,
cacao,
chia,
chocolate,
coconut,
cookie bars,
date sugar,
gluten free,
green banana flour,
nut free,
sweet,
tapioca starch,
vegan,
xanthan gum
Sunday, 6 August 2017
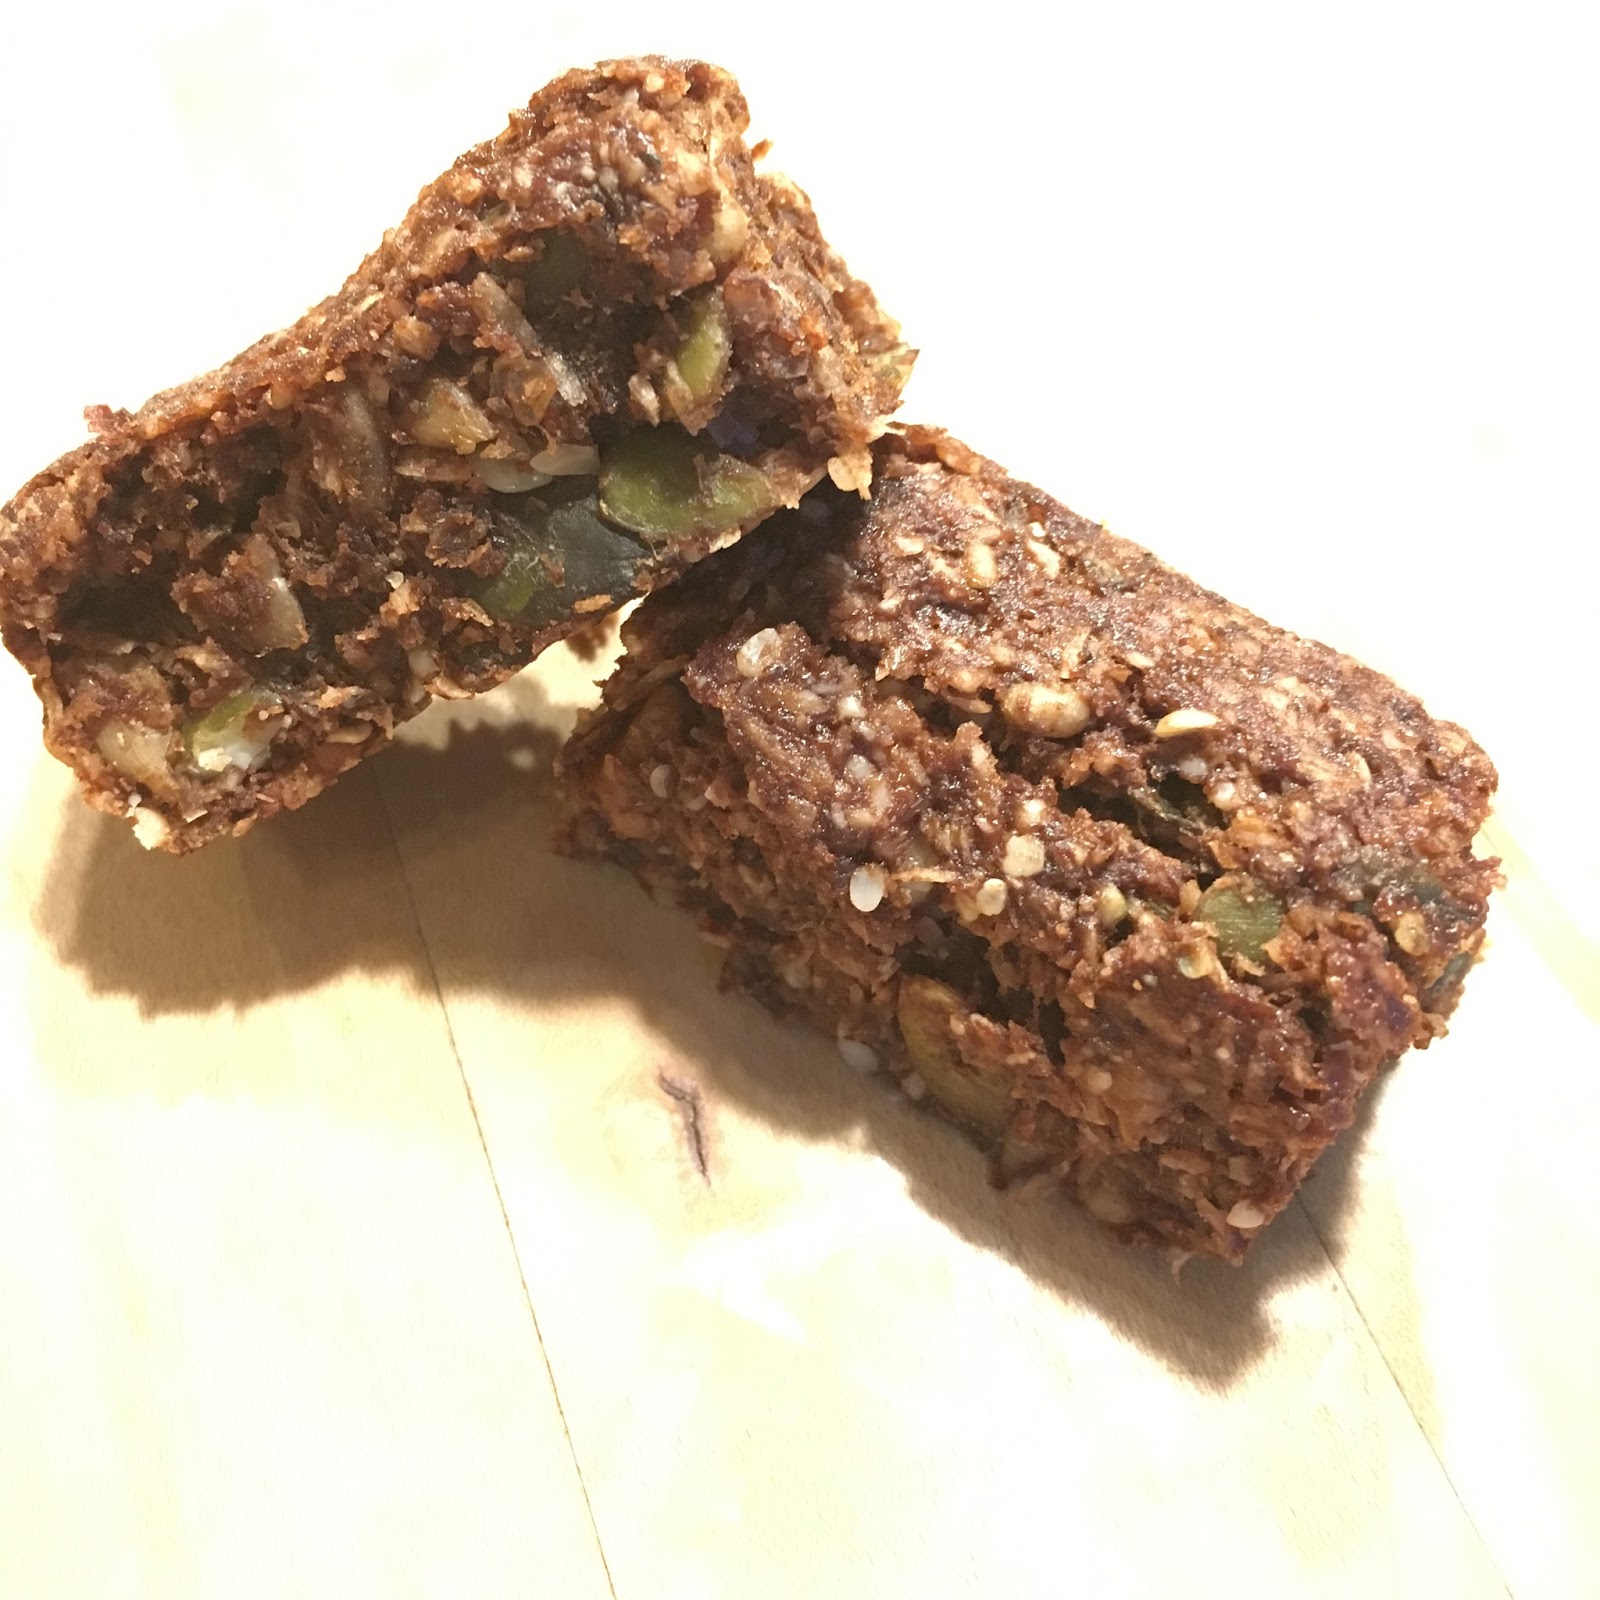
"granola" bars -- gluten free, grain free, sugar free, low inflammatory vegan snacks
Both a friend of mine and I are struggling with auto-immune diseases right now. In an effort to reduce grain proteins, starches, and sugars in an effort to decrease our inflammatory load, I came up with these awesome bites. Soaking the seeds and nuts before using helps that too!!
equipment needed:
mixing bowl
mixing spoon
measuring cups
measuring spoon
coffee or seed grinder
oven
square pans -- I like silicone pans -- 8 inch x 2 (and place the silicone on a metal baking sheet for stability)
metal spatula (for cutting the bars after
(or a knife and cutting board)
ingredients:
1/2 cup coconut butter
1 cup xylitol
1/2 cup boiling water
1 tbsp apple cider vinegar
1 tbsp psyllium powder
1/4 cup green banana flour
1/4 cup ground chia seeds
1 cup almond flour
1/2 tsp xanthan gum
1 tsp baking soda
1 tsp cream of tartar
1/2 tsp sea salt
1/2 tsp tonka bean power
(optional 2 tbsp cacao powder)
1/2 cup hemp hearts
2 cups shredded coconut
1/2 cup pumpkin seeds
1/2 cup sunflower seeds
1 cup walnut pieces
345 for 40 to 45 minutes
equipment needed:
mixing bowl
mixing spoon
measuring cups
measuring spoon
coffee or seed grinder
oven
square pans -- I like silicone pans -- 8 inch x 2 (and place the silicone on a metal baking sheet for stability)
metal spatula (for cutting the bars after
(or a knife and cutting board)
ingredients:
1/2 cup coconut butter
1 cup xylitol
1/2 cup boiling water
1 tbsp apple cider vinegar
1 tbsp psyllium powder
1/4 cup green banana flour
1/4 cup ground chia seeds
1 cup almond flour
1/2 tsp xanthan gum
1 tsp baking soda
1 tsp cream of tartar
1/2 tsp sea salt
1/2 tsp tonka bean power
(optional 2 tbsp cacao powder)
1/2 cup hemp hearts
2 cups shredded coconut
1/2 cup pumpkin seeds
1/2 cup sunflower seeds
1 cup walnut pieces
345 for 40 to 45 minutes
Sunday, 11 June 2017
Black Bean Brownies Bigger Better Faster -- gluten free goodness
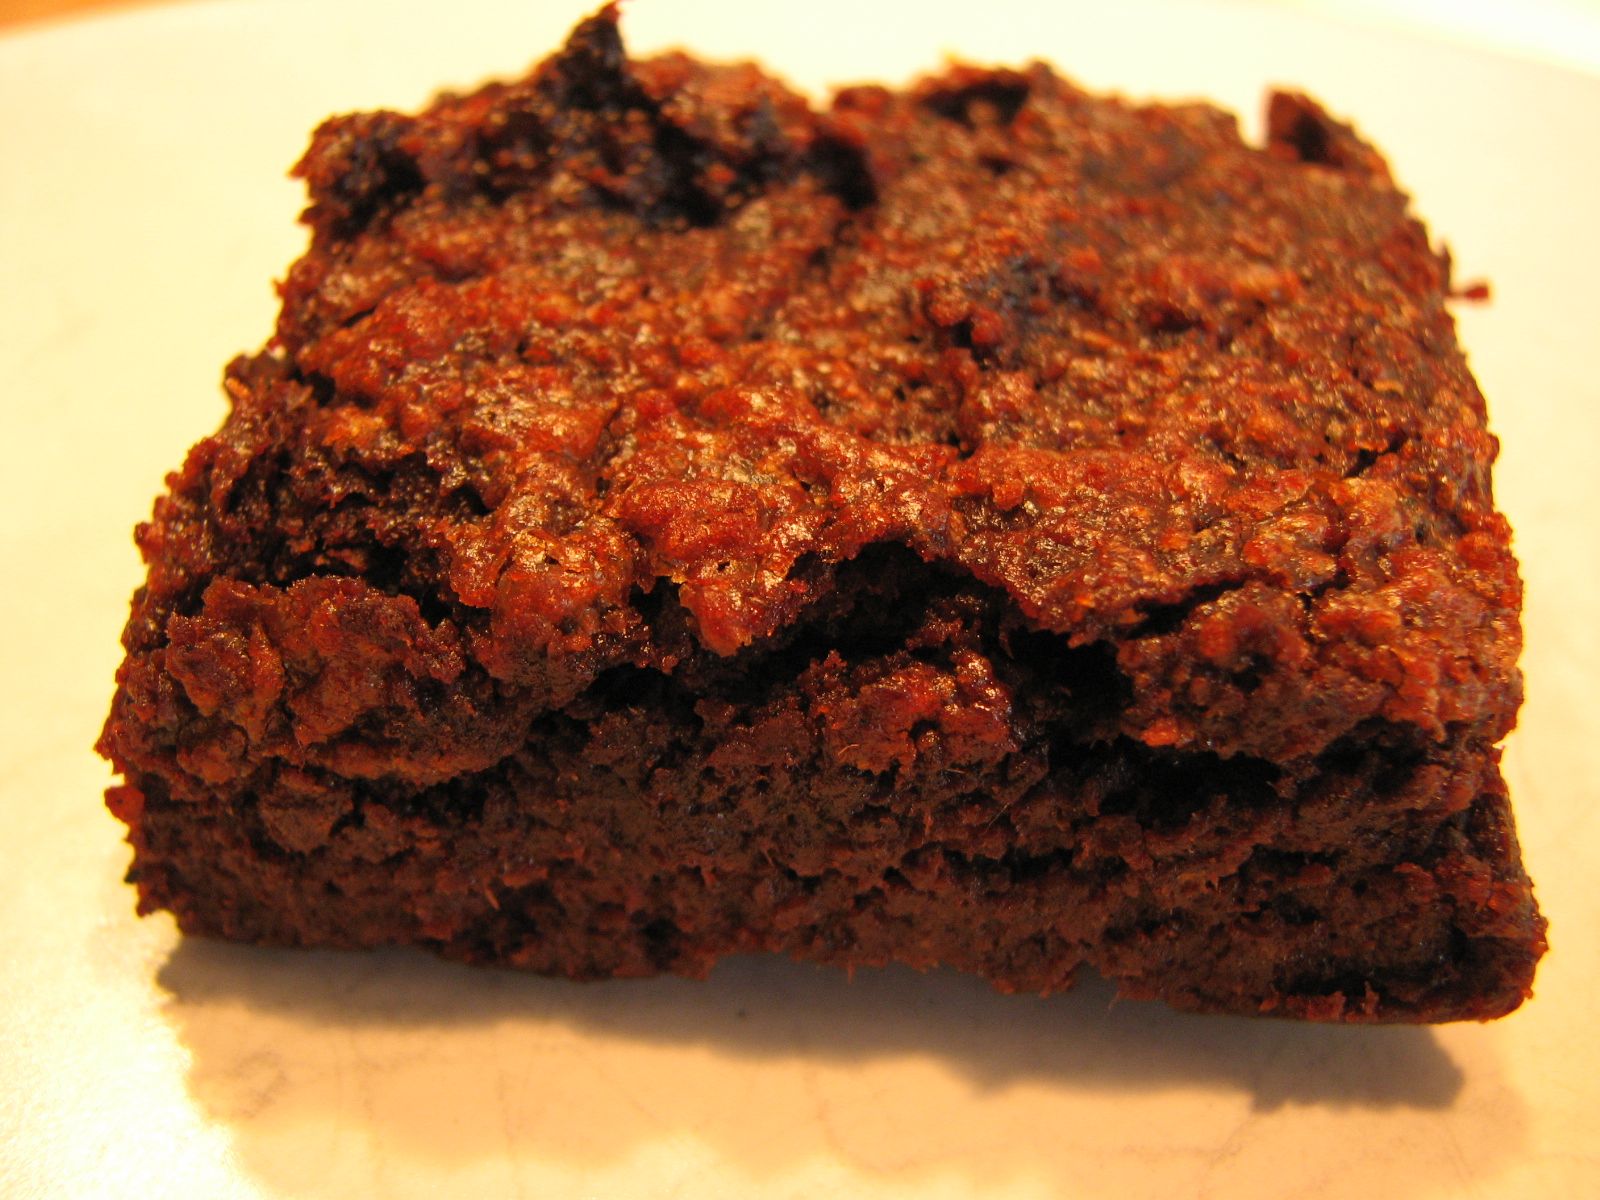
Welcome to the dark side, friends. A place where the perfect brownie is made with black bean flour. A place where the perfect brownie is a dense, fudgey square of cake filled with chocolate, flavour, and deliciousness. A place where brownie lover go to give up their 'I hate gluten-free baking' card. These brownies use black bean flour instead of black beans themselves, and are a perfect cake texture -- dense but not gummy. Fluffy but not light. I mean, a brownie has got to have substance. This is no angel cake, dears. Far too ... naughty ... for that. It really doesn't get better than this.
One caveat -- they are best when baked 1 day before you need them. Why? I don't know. It's just the way it is.
equipment needed:
mixing bowl
mixing spoon
measuring cups
measuring spoons
square baking dish (I used silicone but glass is good too -- just make sure you grease it well with coconut oil and maybe line the bottom with parchment)
a grinder for the chia seeds if you buy whole and grind them yourself (or buy ground chia)
oven (obvi)
ingredients:
a)
1 cup black bean flour
1 1/4 cup coconut sugar (or as an alt: 1 cup xylitol + 1/4 cup coconut sugar +1/4 cup date sugar)
1/2 cup date sugar
1/2 cup raw cacao
b)
1/4 cup ground chia seed
1/2 cup tapioca starch
1 tsp baking soda
2 tsp cream of tartar
1/2 tsp sea salt
1/2 tsp ground vanilla bean or 1/2 tsp tonka bean powder
1 tsp xanthan gum (stabilizer)
c)
1 cup warm water + 2 tbsp coconut oil
1 cup cold water (total water is 2 cups)
1 tsp vanilla extract
1 tbsp apple cider vinegar
d)
1 cup chocolate chips -- fair trade, please
e)
2 tbsp coconut sugar to sprinkle on top
directions:
preheat oven to 345 and prepare your baking pan!!
1. combine 1 cup warm water and 2 tbsp coconut oil and let it melt
2. in a large mixing bowl, combine all the ingredients from parts a) and b) and stir until completely homogeneous.
3. in a small mixing bowl, combine all the ingredients from part c)
4. combine all of the above, and mix well
5. once the ingredients from a) b) and c) have been righteously integrated, stir in your chocolate chips (part d)
6. pour the batter into the baking pan, and make sure it's smooth and even
7. sprinkle the top of the batter with the coconut sugar from part e)
8. bake at 345 for 40-45 minutes
9. Cool and then enjoy the NEXT DAY
seriously.
my husband eats them right away, and says they are great, but even he agrees they are BETTER the next day.
MAKE AHEAD MAKE AHEAD MAKE AHEAD
this is not a recipe for immediate gratification.
One caveat -- they are best when baked 1 day before you need them. Why? I don't know. It's just the way it is.
equipment needed:
mixing bowl
mixing spoon
measuring cups
measuring spoons
square baking dish (I used silicone but glass is good too -- just make sure you grease it well with coconut oil and maybe line the bottom with parchment)
a grinder for the chia seeds if you buy whole and grind them yourself (or buy ground chia)
oven (obvi)
ingredients:
a)
1 cup black bean flour
1 1/4 cup coconut sugar (or as an alt: 1 cup xylitol + 1/4 cup coconut sugar +1/4 cup date sugar)
1/2 cup date sugar
1/2 cup raw cacao
b)
1/4 cup ground chia seed
1/2 cup tapioca starch
1 tsp baking soda
2 tsp cream of tartar
1/2 tsp sea salt
1/2 tsp ground vanilla bean or 1/2 tsp tonka bean powder
1 tsp xanthan gum (stabilizer)
c)
1 cup warm water + 2 tbsp coconut oil
1 cup cold water (total water is 2 cups)
1 tsp vanilla extract
1 tbsp apple cider vinegar
d)
1 cup chocolate chips -- fair trade, please
e)
2 tbsp coconut sugar to sprinkle on top
directions:
preheat oven to 345 and prepare your baking pan!!
1. combine 1 cup warm water and 2 tbsp coconut oil and let it melt
2. in a large mixing bowl, combine all the ingredients from parts a) and b) and stir until completely homogeneous.
3. in a small mixing bowl, combine all the ingredients from part c)
4. combine all of the above, and mix well
5. once the ingredients from a) b) and c) have been righteously integrated, stir in your chocolate chips (part d)
6. pour the batter into the baking pan, and make sure it's smooth and even
7. sprinkle the top of the batter with the coconut sugar from part e)
8. bake at 345 for 40-45 minutes
9. Cool and then enjoy the NEXT DAY
seriously.
my husband eats them right away, and says they are great, but even he agrees they are BETTER the next day.
MAKE AHEAD MAKE AHEAD MAKE AHEAD
this is not a recipe for immediate gratification.
Labels:
black bean,
brownie,
cacao,
chia,
dessert,
gluten free,
grain free,
sugar-free,
tapioca,
vegan
Monday, 28 November 2016
Because I cracked the Black Bean Brownie Code
Friends, lovely cake loving friends, I have news. Okay, so I already spilled the proverbial and literal beans in the title of this recipe, but I've never been one to keep good news to myself. Friends, it's true. I have cracked the black bean brownie code, and it is more beautiful than you could have imagined.
Picture this:
a brownie.
Yep.
That kind of moist and a little dense and fudgey brownie that makes you do a little dance and say oh yes oh god oh yes oh thank god. You know the kind. Of course you should know better than to talk with your mouth full but you will for realsies be forgiven because this is that good.
I've seen black bean brownie recipes kicking around here and there and they looked unappealing. I have to confess that one of my favourite baking flours for a little while was chickpea flour. So versatile.
My secret in these brownies: I don't use a can of black beans. I use black bean flour.
Nothing to puree. Nothing to blend. Just measure, mix, and go. Simple. And the texture is not gummy or dense. It's perfection. So there you have it.
A nut-free, vegan, gluten-free, perfect brownie that tastes just right.
OH, one small quirk: it taste better the next day. So, bake it, cool it, and refrigerate it over night. Then: eat. So. Good.
equipment needed:
mixing bowl
mixing spoon
measuring cups
measuring spoons
square baking dish (I used silicone but glass is good too -- just make sure you grease it well with coconut oil and maybe line the bottom with parchment)
a grinder for the chia seeds if you buy whole and grind them yourself (or buy ground chia)
oven (obvi)
ingredients:
a)
1 cup black bean flour
1 1/4 cup coconut sugar (or as an alt: 1 cup xylitol + 1/4 cup coconut sugar +1/4 cup date sugar)
1/2 cup date sugar
1/2 cup raw cacao
b)
1/4 cup ground chia seed
1/2 cup tapioca starch
1 tsp baking soda
2 tsp cream of tartar
1/2 tsp sea salt
1/2 tsp ground vanilla bean
c)
1 cup warm water + 2 tbsp coconut oil
1 cup cold water (total water is 2 cups)
1 tsp vanilla extract
1 tbsp apple cider vinegar
d)
1 cup chocolate chips -- fair trade, please
e)
plus either 2 tbsp chocolate chips or 2 tbsp coconut sugar to sprinkle on top
directions:
preheat oven to 345 and prepare your baking pan!!
1. combine 1 cup warm water and 2 tbsp coconut oil and let it melt
2. in a large mixing bowl, combine all the ingredients from parts a) and b) and stir until completely homogeneous.
3. in a small mixing bowl, combine all the ingredients from part c)
4. combine all of the above, and mix well
5. once the ingredients from a) b) and c) have been righteously integrated, stir in your chocolate chips (part d)
6. pour the batter into the baking pan, and make sure it's smooth and even
7. sprinkle the top of the batter with either the chocolate chips or the coconut sugar from part e)
8. bake at 345 for 40-45 minutes
9. Cool and then enjoy the NEXT DAY
seriously.
my husband eats them right away, and says they are great, but even he agrees they are BETTER the next day.
MAKE AHEAD MAKE AHEAD MAKE AHEAD
this is not a recipe for immediate gratification.
Picture this:
a brownie.
Yep.
That kind of moist and a little dense and fudgey brownie that makes you do a little dance and say oh yes oh god oh yes oh thank god. You know the kind. Of course you should know better than to talk with your mouth full but you will for realsies be forgiven because this is that good.
I've seen black bean brownie recipes kicking around here and there and they looked unappealing. I have to confess that one of my favourite baking flours for a little while was chickpea flour. So versatile.
My secret in these brownies: I don't use a can of black beans. I use black bean flour.
Nothing to puree. Nothing to blend. Just measure, mix, and go. Simple. And the texture is not gummy or dense. It's perfection. So there you have it.
A nut-free, vegan, gluten-free, perfect brownie that tastes just right.
OH, one small quirk: it taste better the next day. So, bake it, cool it, and refrigerate it over night. Then: eat. So. Good.
equipment needed:
mixing bowl
mixing spoon
measuring cups
measuring spoons
square baking dish (I used silicone but glass is good too -- just make sure you grease it well with coconut oil and maybe line the bottom with parchment)
a grinder for the chia seeds if you buy whole and grind them yourself (or buy ground chia)
oven (obvi)
ingredients:
a)
1 cup black bean flour
1 1/4 cup coconut sugar (or as an alt: 1 cup xylitol + 1/4 cup coconut sugar +1/4 cup date sugar)
1/2 cup date sugar
1/2 cup raw cacao
b)
1/4 cup ground chia seed
1/2 cup tapioca starch
1 tsp baking soda
2 tsp cream of tartar
1/2 tsp sea salt
1/2 tsp ground vanilla bean
c)
1 cup warm water + 2 tbsp coconut oil
1 cup cold water (total water is 2 cups)
1 tsp vanilla extract
1 tbsp apple cider vinegar
d)
1 cup chocolate chips -- fair trade, please
e)
plus either 2 tbsp chocolate chips or 2 tbsp coconut sugar to sprinkle on top
directions:
preheat oven to 345 and prepare your baking pan!!
1. combine 1 cup warm water and 2 tbsp coconut oil and let it melt
2. in a large mixing bowl, combine all the ingredients from parts a) and b) and stir until completely homogeneous.
3. in a small mixing bowl, combine all the ingredients from part c)
4. combine all of the above, and mix well
5. once the ingredients from a) b) and c) have been righteously integrated, stir in your chocolate chips (part d)
6. pour the batter into the baking pan, and make sure it's smooth and even
7. sprinkle the top of the batter with either the chocolate chips or the coconut sugar from part e)
8. bake at 345 for 40-45 minutes
9. Cool and then enjoy the NEXT DAY
seriously.
my husband eats them right away, and says they are great, but even he agrees they are BETTER the next day.
MAKE AHEAD MAKE AHEAD MAKE AHEAD
this is not a recipe for immediate gratification.
Labels:
black bean flour,
brownies,
chia,
coconut sugar,
date sugar,
dessert,
gluten free,
grain free,
plant based,
sugar free,
tapioca,
vegan,
whole food,
xylitol
Saturday, 9 April 2016
Sour Dough -- the return of the monster
Almost 2 years after I took a break from making sourdough, I took my dormant monster out of the freezer. When the contents of the jar defrosted, it smelled heavenly -- that sour sweet smell of a healthy happy sourdough starter. Ah, fermentation, my good friend.
After a few days of regular feedings, the bubbling beast was ready to get to work. I made bread! Kamut flour with oat bran and whole chia seeds. Why? I don't know. It was a thing of beauty. I baked it in my cast iron dutch oven like a good little sheeple, and lovely bread was the result. Since then, I've done freeform loaves on a baking sheet, baked in an oven with a bowl of water for extra steamy goodness.
I've thrown in steel cut oats as well as oat bran, just out of curiosity. I like a bread with a bit of 'tooth' to it. Not so much that it, you know, bites back, but still.
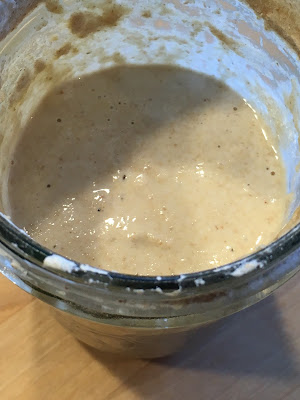
Make your own starter:
1. in a clean glass container (like a wide mouth mason jar) combine equal weights of flour and water, and stir it into a sloppy sloopy pasty slurry. I use a kitchen scale for this endeavour. I have started using spelt flour, I have also fed it on kamut flour. I am not a white flour person. I have never been a white flour person. If you want to do yours with white flour, I bet your resulting loaf will look a lot prettier than mine.
2. mix the four and water well, and cover with a clean cloth (I use a small dishcloth, secured with an elastic. This is just me. I don't know what real bread makers do)
3. 'feed' this incipient levain with equal weights of flour and water every 12 hours. Or every 24 hours. Experiment with this. It will change the taste of your bread because frequency of feeding selects for proliferation of different organisms, some sweeter, some more sour.
4. after a week or so, your starter should smell fermenty, sweet and sour, and be bubbly and swell up in the jar. If it smells bad, or looks mouldy, throw it out and start again!
5. When the starter swells up and puffs up between feedings, you know you are good to go. Like a well roasted vegan marshmallow. Poof!!
Bake your own bread:
Here's what I'm grooving on right now:
ingredients:
1 cup HUNGRY sour dough starter -- don't have fed it since the night before
2 cups water
2 tsp sea salt
1 cup oat bran
1/4 cup whole chia seeds
3 (-ish) cups kamut flour
(I added 1 cup of steel cut oats to my last creation. In addition to the oat bran. Yes, I'm a weirdo. Like! Love!! That's just me, though. If you are a white flour person, you might like a lighter, daintier loaf.)
directions:
(I'm a big fat cheater, and no matter what anyone tells you otherwise, it's true.)
1. mix together all your ingredients, and add enough flour to get a somewhat sticky dough that holds together perfectly.
2. either place in a cast iron pot lined with parchment, close the lid and allow to rise
or
shape into loaves on a silicone baking mat, cover with parchment, cover with a wet towel, and allow to rise.
3. give it between 4 and 12 hours if possible.
I made free form loaves on a silicone mat on a baking sheet. I kind of rolled them around in oat bran. to make them look cute. It's like makeup. Not essential. Looks fetching sometimes.
I let them rise until I ran out of time. More rising is good. Some people let it rise then knead it and fold it. I'm way too lazy for extra steps. Busy. I'm way too busy, I mean.
Rise for 8 hours if possible.
******make sure you feed your residual starter now that you've harvested enough to make your bread!!!!! A hungry monster is not a happy monster. *******
bake at 345 for 1 hour if in a cast iron pot
bake at 345 for less time if you've shaped two free form loaves on a silicone mat on a baking sheet. Maybe 45 minutes!
This is what I did. But like I said, I'm a big, fat cheater. Ole!!
After a few days of regular feedings, the bubbling beast was ready to get to work. I made bread! Kamut flour with oat bran and whole chia seeds. Why? I don't know. It was a thing of beauty. I baked it in my cast iron dutch oven like a good little sheeple, and lovely bread was the result. Since then, I've done freeform loaves on a baking sheet, baked in an oven with a bowl of water for extra steamy goodness.
I've thrown in steel cut oats as well as oat bran, just out of curiosity. I like a bread with a bit of 'tooth' to it. Not so much that it, you know, bites back, but still.
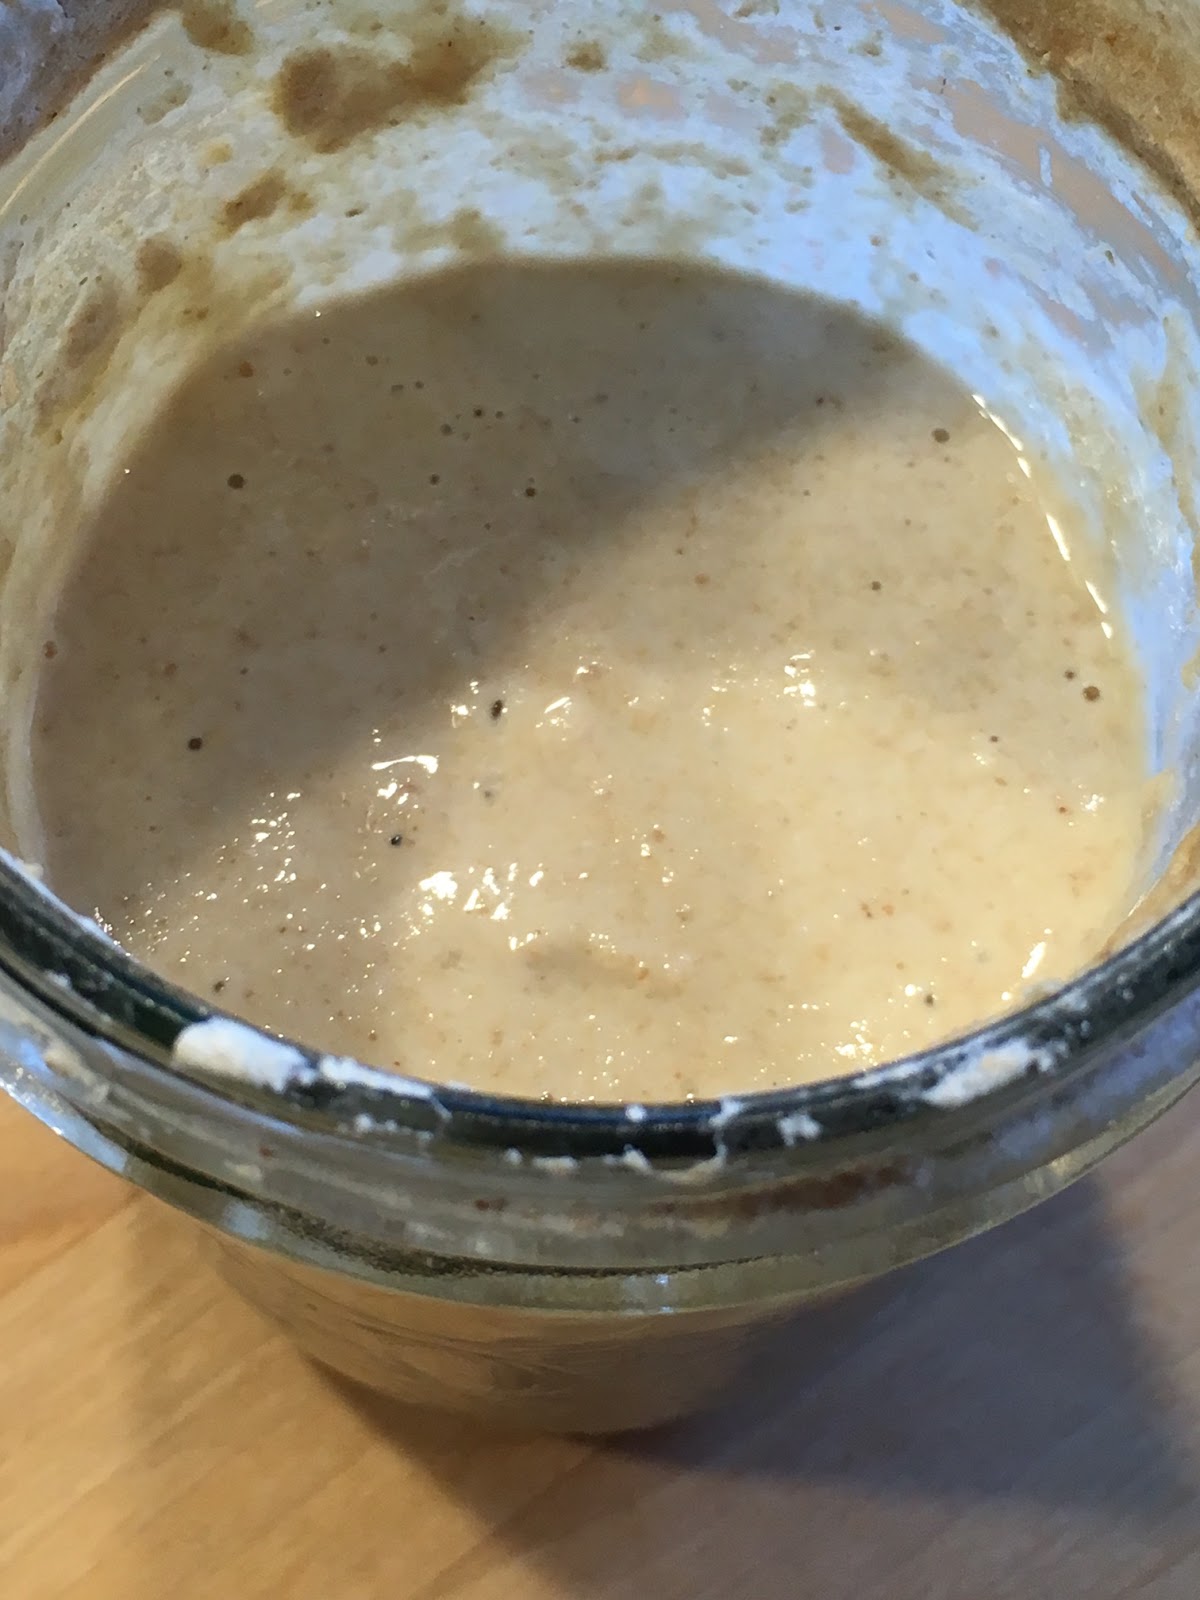
| just after feeding |
| just after feeding |
| a couple of hours later -- lots of action |
| fluffing up, full of bubbles -- happy starter!! |
Make your own starter:
1. in a clean glass container (like a wide mouth mason jar) combine equal weights of flour and water, and stir it into a sloppy sloopy pasty slurry. I use a kitchen scale for this endeavour. I have started using spelt flour, I have also fed it on kamut flour. I am not a white flour person. I have never been a white flour person. If you want to do yours with white flour, I bet your resulting loaf will look a lot prettier than mine.
2. mix the four and water well, and cover with a clean cloth (I use a small dishcloth, secured with an elastic. This is just me. I don't know what real bread makers do)
3. 'feed' this incipient levain with equal weights of flour and water every 12 hours. Or every 24 hours. Experiment with this. It will change the taste of your bread because frequency of feeding selects for proliferation of different organisms, some sweeter, some more sour.
4. after a week or so, your starter should smell fermenty, sweet and sour, and be bubbly and swell up in the jar. If it smells bad, or looks mouldy, throw it out and start again!
5. When the starter swells up and puffs up between feedings, you know you are good to go. Like a well roasted vegan marshmallow. Poof!!
Bake your own bread:
Here's what I'm grooving on right now:
ingredients:
1 cup HUNGRY sour dough starter -- don't have fed it since the night before
2 cups water
2 tsp sea salt
1 cup oat bran
1/4 cup whole chia seeds
3 (-ish) cups kamut flour
(I added 1 cup of steel cut oats to my last creation. In addition to the oat bran. Yes, I'm a weirdo. Like! Love!! That's just me, though. If you are a white flour person, you might like a lighter, daintier loaf.)
directions:
(I'm a big fat cheater, and no matter what anyone tells you otherwise, it's true.)
1. mix together all your ingredients, and add enough flour to get a somewhat sticky dough that holds together perfectly.
2. either place in a cast iron pot lined with parchment, close the lid and allow to rise
or
shape into loaves on a silicone baking mat, cover with parchment, cover with a wet towel, and allow to rise.
3. give it between 4 and 12 hours if possible.
I made free form loaves on a silicone mat on a baking sheet. I kind of rolled them around in oat bran. to make them look cute. It's like makeup. Not essential. Looks fetching sometimes.
I let them rise until I ran out of time. More rising is good. Some people let it rise then knead it and fold it. I'm way too lazy for extra steps. Busy. I'm way too busy, I mean.
Rise for 8 hours if possible.
******make sure you feed your residual starter now that you've harvested enough to make your bread!!!!! A hungry monster is not a happy monster. *******
bake at 345 for 1 hour if in a cast iron pot
bake at 345 for less time if you've shaped two free form loaves on a silicone mat on a baking sheet. Maybe 45 minutes!
This is what I did. But like I said, I'm a big, fat cheater. Ole!!
Labels:
chia,
kamut,
levain,
oat bran,
sourdough,
sourdough bread,
starter,
steel cut oats,
wild yeast
Monday, 4 April 2016
Where Brownies Fear to Tread -- vegan brownies
We really do make the most amazing brownies. They are dense and fudgey, chewy and utterly satisfying. This are made without refined sugars, and are gluten free. I use either raw almond flour or finely ground raw sunflower seeds for these. Raw sunflower seeds can be reduced to a delicate powder in a seed or coffee grinder, so they have an ideal texture for baking. Beautiful, really. And the flavour is calm enough that it doesn't balance of whatever you put them in. Pumpkin seeds -- aka pepitas, bless their little green hearts -- have such a strong flavour that you must use them purposefully, not just as an alternative. Yes, so these ones. These brownies. A few tweaks here and there, the recipe evolves a little. But they are great. Next time I'll grind up a couple of espresso beans with the chia seeds, and maybe a chili flake or two. You know, for fun.
equipment needed:
hand blender -- aka immersion blender
seed grinder -- or coffee grinder
mixing bowls
mixing spoons
measuring cups
measuring spoons
kettle for boiling water
oven
2 square silicone baking pans (8x8 each)
cooling rack
ingredients:
a)
1 1/2 cup pitted honey dates
1 1/2 cups boiling water
1/2 cup extra virgin coconut oil
1 cup coconut nectar
1 tbsp apple cider vinegar
1 tsp vanilla extract
b)
1/2 cup hemp hearts
c)
1/2 cup tapioca starch
1/4 cup chia seeds, finely ground
1 cup raw almond flour or finely ground sunflower seed flour
1/4 cup coconut flour
1/2 tsp ground vanilla
1/2 tsp sea salt
1 tsp baking soda
2 tsp cream of tartar
1 cup raw cacao powder
d)
coconut sugar to sprinkle on top -- use plenty, it's awesome that way.
directions:
preheat the oven to 345
1) in a mixing bowl, put your ingredients from part a) and let them sit for 10 minutes. Add b) and let sit for another 10 minutes at least. If your dates start out very hard, give it longer. Give it an hour!!
2) in a separate bowl, combine your ingredients from part c). Make sure they are really well stirred together
3) when your dates are super soft and saturated, use your immersion blender to puree the concoction to smooth and velvety perfections
4) mix your puree and your ingredients from part c) together
5) divide evenly between 2 square silicone pans (or a large rectangular is fine if that's what you've got)
6) sprinkle a tbsp or so of coconut sugar on top of each pan before you put them in the oven
7) bake for 50 minutes at 345
8) cool before cutting and removing from the pan
Friday, 1 April 2016
Chocolate Oatmeal Chocolate Chip Soft Cookies
What happens when you throw a bunch of stuff together in a bowl? Well, sometimes something like this: soft, vegan, oatmeal chocolate cookies with chocolate chips. You had me at cookie.
equipment needed:
baking sheets
silicone baking mats or parchment
mixing bowl
mixing spoon
measuring cups
measuring spoons
seed grinder
ingredients:
a)
2 cups scotch oatmeal
1/2 cup tapioca starch
1 cup shredded coconut
1/4 cup ground chia seeds
1/2 cup raw cacao powder
1 cup coconut sugar
1/2 cup date sugar
b)
1/2 tsp sea salt
1/2 tsp ground vanilla bean
1 tsp baking soda
2 tsp cream of tartar
c)
2 cups water
d)
1 cup chocolate chips
directions:
preheat the oven to 345
1. combine ingredients from a) and b) in a large mixing bowl
2. mix well
3. add c) and mix very well
4. finally stir in part d) and mix well
5. scoop by small spoonful onto a lined baking sheet
6. bake for 15 to 20 minutes at 345
7. makes approx 4 dozen small cookies
equipment needed:
baking sheets
silicone baking mats or parchment
mixing bowl
mixing spoon
measuring cups
measuring spoons
seed grinder
ingredients:
a)
2 cups scotch oatmeal
1/2 cup tapioca starch
1 cup shredded coconut
1/4 cup ground chia seeds
1/2 cup raw cacao powder
1 cup coconut sugar
1/2 cup date sugar
b)
1/2 tsp sea salt
1/2 tsp ground vanilla bean
1 tsp baking soda
2 tsp cream of tartar
c)
2 cups water
d)
1 cup chocolate chips
directions:
preheat the oven to 345
1. combine ingredients from a) and b) in a large mixing bowl
2. mix well
3. add c) and mix very well
4. finally stir in part d) and mix well
5. scoop by small spoonful onto a lined baking sheet
6. bake for 15 to 20 minutes at 345
7. makes approx 4 dozen small cookies
Labels:
cacao,
chia,
chocolate,
chocolate chip,
coconut,
coconut sugar,
cookies,
date sugar,
nut-free,
oatmeal,
vegan
Soft Oatmeal and Raisin Cookies -- vegan, nut free, and easy
These are very soft, very yummy, and quick to make.
I made some chocolate chocolate chip oatmeal the other day. The cacao powder in the mix made the batter thicker, so I found myself adding a little pea protein powder to this one to adjust the texture. Delicious, and dare I say nutritious.
I've been into the super minimalist ingredients lately -- like the mashed banana, oatmeal, and chocolate chip. These are a little more involved. But delicious.
I made some chocolate chocolate chip oatmeal the other day. The cacao powder in the mix made the batter thicker, so I found myself adding a little pea protein powder to this one to adjust the texture. Delicious, and dare I say nutritious.
I've been into the super minimalist ingredients lately -- like the mashed banana, oatmeal, and chocolate chip. These are a little more involved. But delicious.
equipment needed:
baking parchment or silicone baking mats
baking sheets
mixing bowl
measuring cups
measuring spoons
mixing spoon
seed grinder
ingredients:
a)
2 cups scotch oatmeal
1/2 cup tapioca starch
1 cup shredded coconut (organic unsweetened)
1 cup coconut sugar
1/4 cup ground chia seeds
1/4 cup pea protein powder
b)
1 tsp cream of tartar + 1/2 tsp baking soda
1/2 tsp sea salt
1 tsp ground ginger
1 tbsp ceylon cinnamon
c)
2 cups water
1 tsp vanilla extract
d)
1 cup organic raisins
directions:
pre-heat the oven to 345 degrees
1. in a large mixing bowl, combine all the ingredients from a) and b)
2. when this mixture is completely integrated, add the ingredients from c) and mix well
3. add the raisins
4. stir well, and let sit for a few minutes
5. scoop spoonfuls of batter onto a lined baking sheet, don't flatten
6. bake for 15 to 20 minutes at 345
(I baked it for 20 minutes when there were 2 trays in the oven, swapping their positions halfway through the bake. I baked a single tray for 15 minutes.)
I got 4 dozen small cookies from this recipe!
Labels:
chia,
coconut,
coconut sugar,
cookies,
nut free,
pea protein,
raisins,
scotch oatmeal,
snack,
soft,
tapioca,
vegan
Saturday, 23 January 2016
** chickpea flour sticks with chili powder -- vegan, gluten free, grain free,
I get my chickpea flour -- in this case besan flour -- from the Indian market up the street. I made these with it. One time with chili powder and mesquite, another time with garlic and oregano. The thing they had in common both times is that they were delicious. But personally, I thought the flavours worked a little better with the garlic and oregano. Although a two year old who was with us seemed to disagree, if the vast quantity of chili powder chickpea flour sticks he ate was any indication.
equipment needed:
measuring cups
measuring spoons
mixing bowl
mixing spoons
silicone mats
baking sheets
ingredients:
1/2 cup warm water
2 tbsp coconut sugar
2 tsp bread yeast
1/4 cup chia seeds
1/2 cup tapioca starch
1 1/2 cups chickpea flour
1/2 cup raw almond flour
1 tsp sea salt
3 tsp chili powder
2 tbsp mesquite
directions:
1. mix together the warm water, coconut sugar, and yeast, and set aside to proof
2. in a bowl combine the dry ingredients
3. add the water/yeast mixture to the dry ingredients and mix to form a dough
4. roll dough into sticks -- sprinkle with large salt
5. let rise for a while
6. bake at 345 for 20 minutes
equipment needed:
measuring cups
measuring spoons
mixing bowl
mixing spoons
silicone mats
baking sheets
ingredients:
1/2 cup warm water
2 tbsp coconut sugar
2 tsp bread yeast
1/4 cup chia seeds
1/2 cup tapioca starch
1 1/2 cups chickpea flour
1/2 cup raw almond flour
1 tsp sea salt
3 tsp chili powder
2 tbsp mesquite
directions:
1. mix together the warm water, coconut sugar, and yeast, and set aside to proof
2. in a bowl combine the dry ingredients
3. add the water/yeast mixture to the dry ingredients and mix to form a dough
4. roll dough into sticks -- sprinkle with large salt
5. let rise for a while
6. bake at 345 for 20 minutes
Labels:
almond flour,
baked,
chia,
chickpea flour,
savoury,
snacks,
spices,
sticks,
tapioca,
vegan
Subscribe to:
Posts (Atom)